

My Thread Painted Quilt Goes To Market (Spring 2016)!
I was awe struck when I first met Tula Pink in November. But I was even more overjoyed to find out that she loved the thread painted mini quilt I made her so much that she said she would be in contact with me.
In early January I was so excited to open my email and find a message from Tula Pink. It felt like a dream! In Tula’s email she explained that she wanted me to make a thread painting using her newest Ultimate Thread Collection for Aurifil Threads. She sent me the design for the cover of her thread collection and I immediately recognized it as the owl from Full Moon Forest. She said I had to include the owl as the focal design and maybe incorporate flowers from various lines, but that the ultimate design was up to me.

I got to work on my design and actually used my Tula Pink coloring book to figure out how I wanted to color the designs and which flowers to use. I decided to include flowers from Chipper, Elizabeth, and Moonshine. I thought it was important to utilize as many colors as I could in the design to best represent the vast range of colors in her threads. My favorite colors are pink and aqua so I wanted those to be the main colors in the thread painting with splashes of purple, orange, yellow and green. Tula mentioned that it would cool if I could thread paint the colors with an ombré effect, so in almost every large section that’s exactly what I did! I was very nervous to send her my colored design because what if she said she didn’t like it and I’d have to start all over again. I felt a huge sense of relief when she said she liked my design.
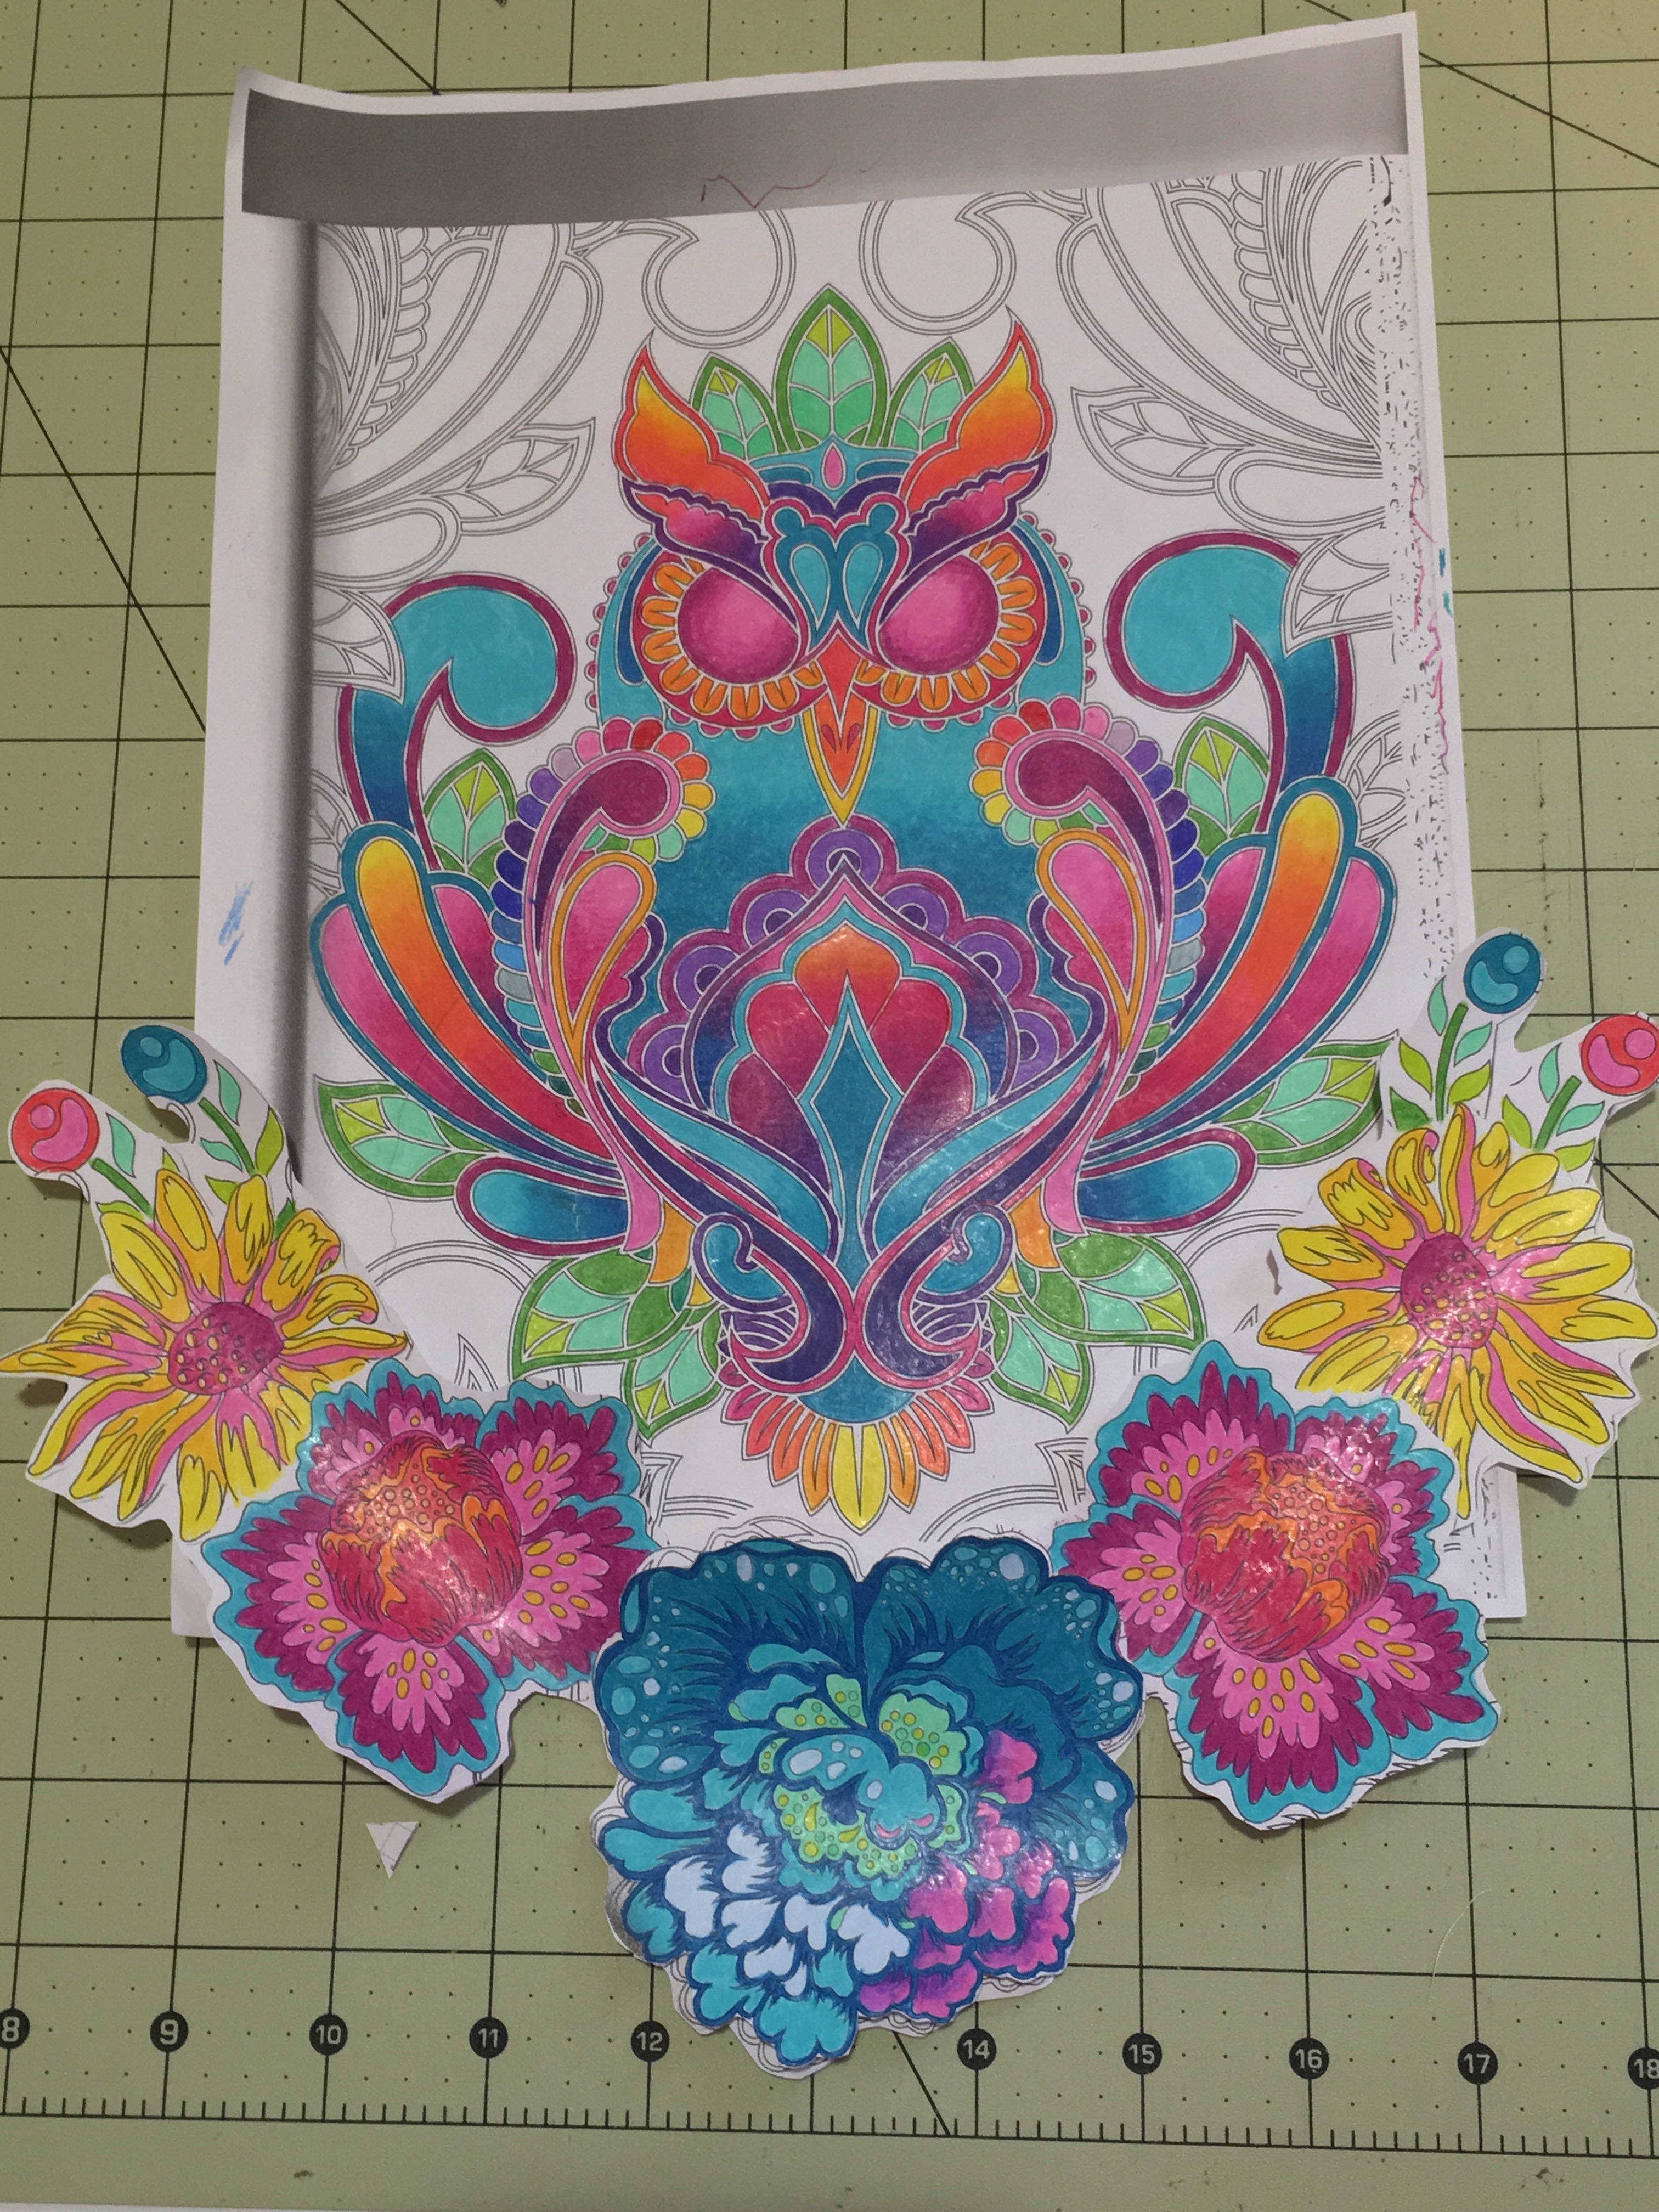
Now I had to figure out exactly how large to blow up the design so that the the thread would make an impact from far away (but also that I could realistically thread paint in the time I had and with the amount of thread I was given). My next challenge was determining how I was going to transfer this large design onto my fabric (Tula Pink True Colors grey daisies). I thought my best bet would be to use a light box, except that the light box was very small compared to the size of my design. I decided to keep tracing even though it was like seeing through mud and every time I moved onto a different area I had to shift the design/fabric on the light box (this was very frustrating since most of the time my previous lines did not match up!!) Despite my frustration I finished tracing onto my fabric with pencil.
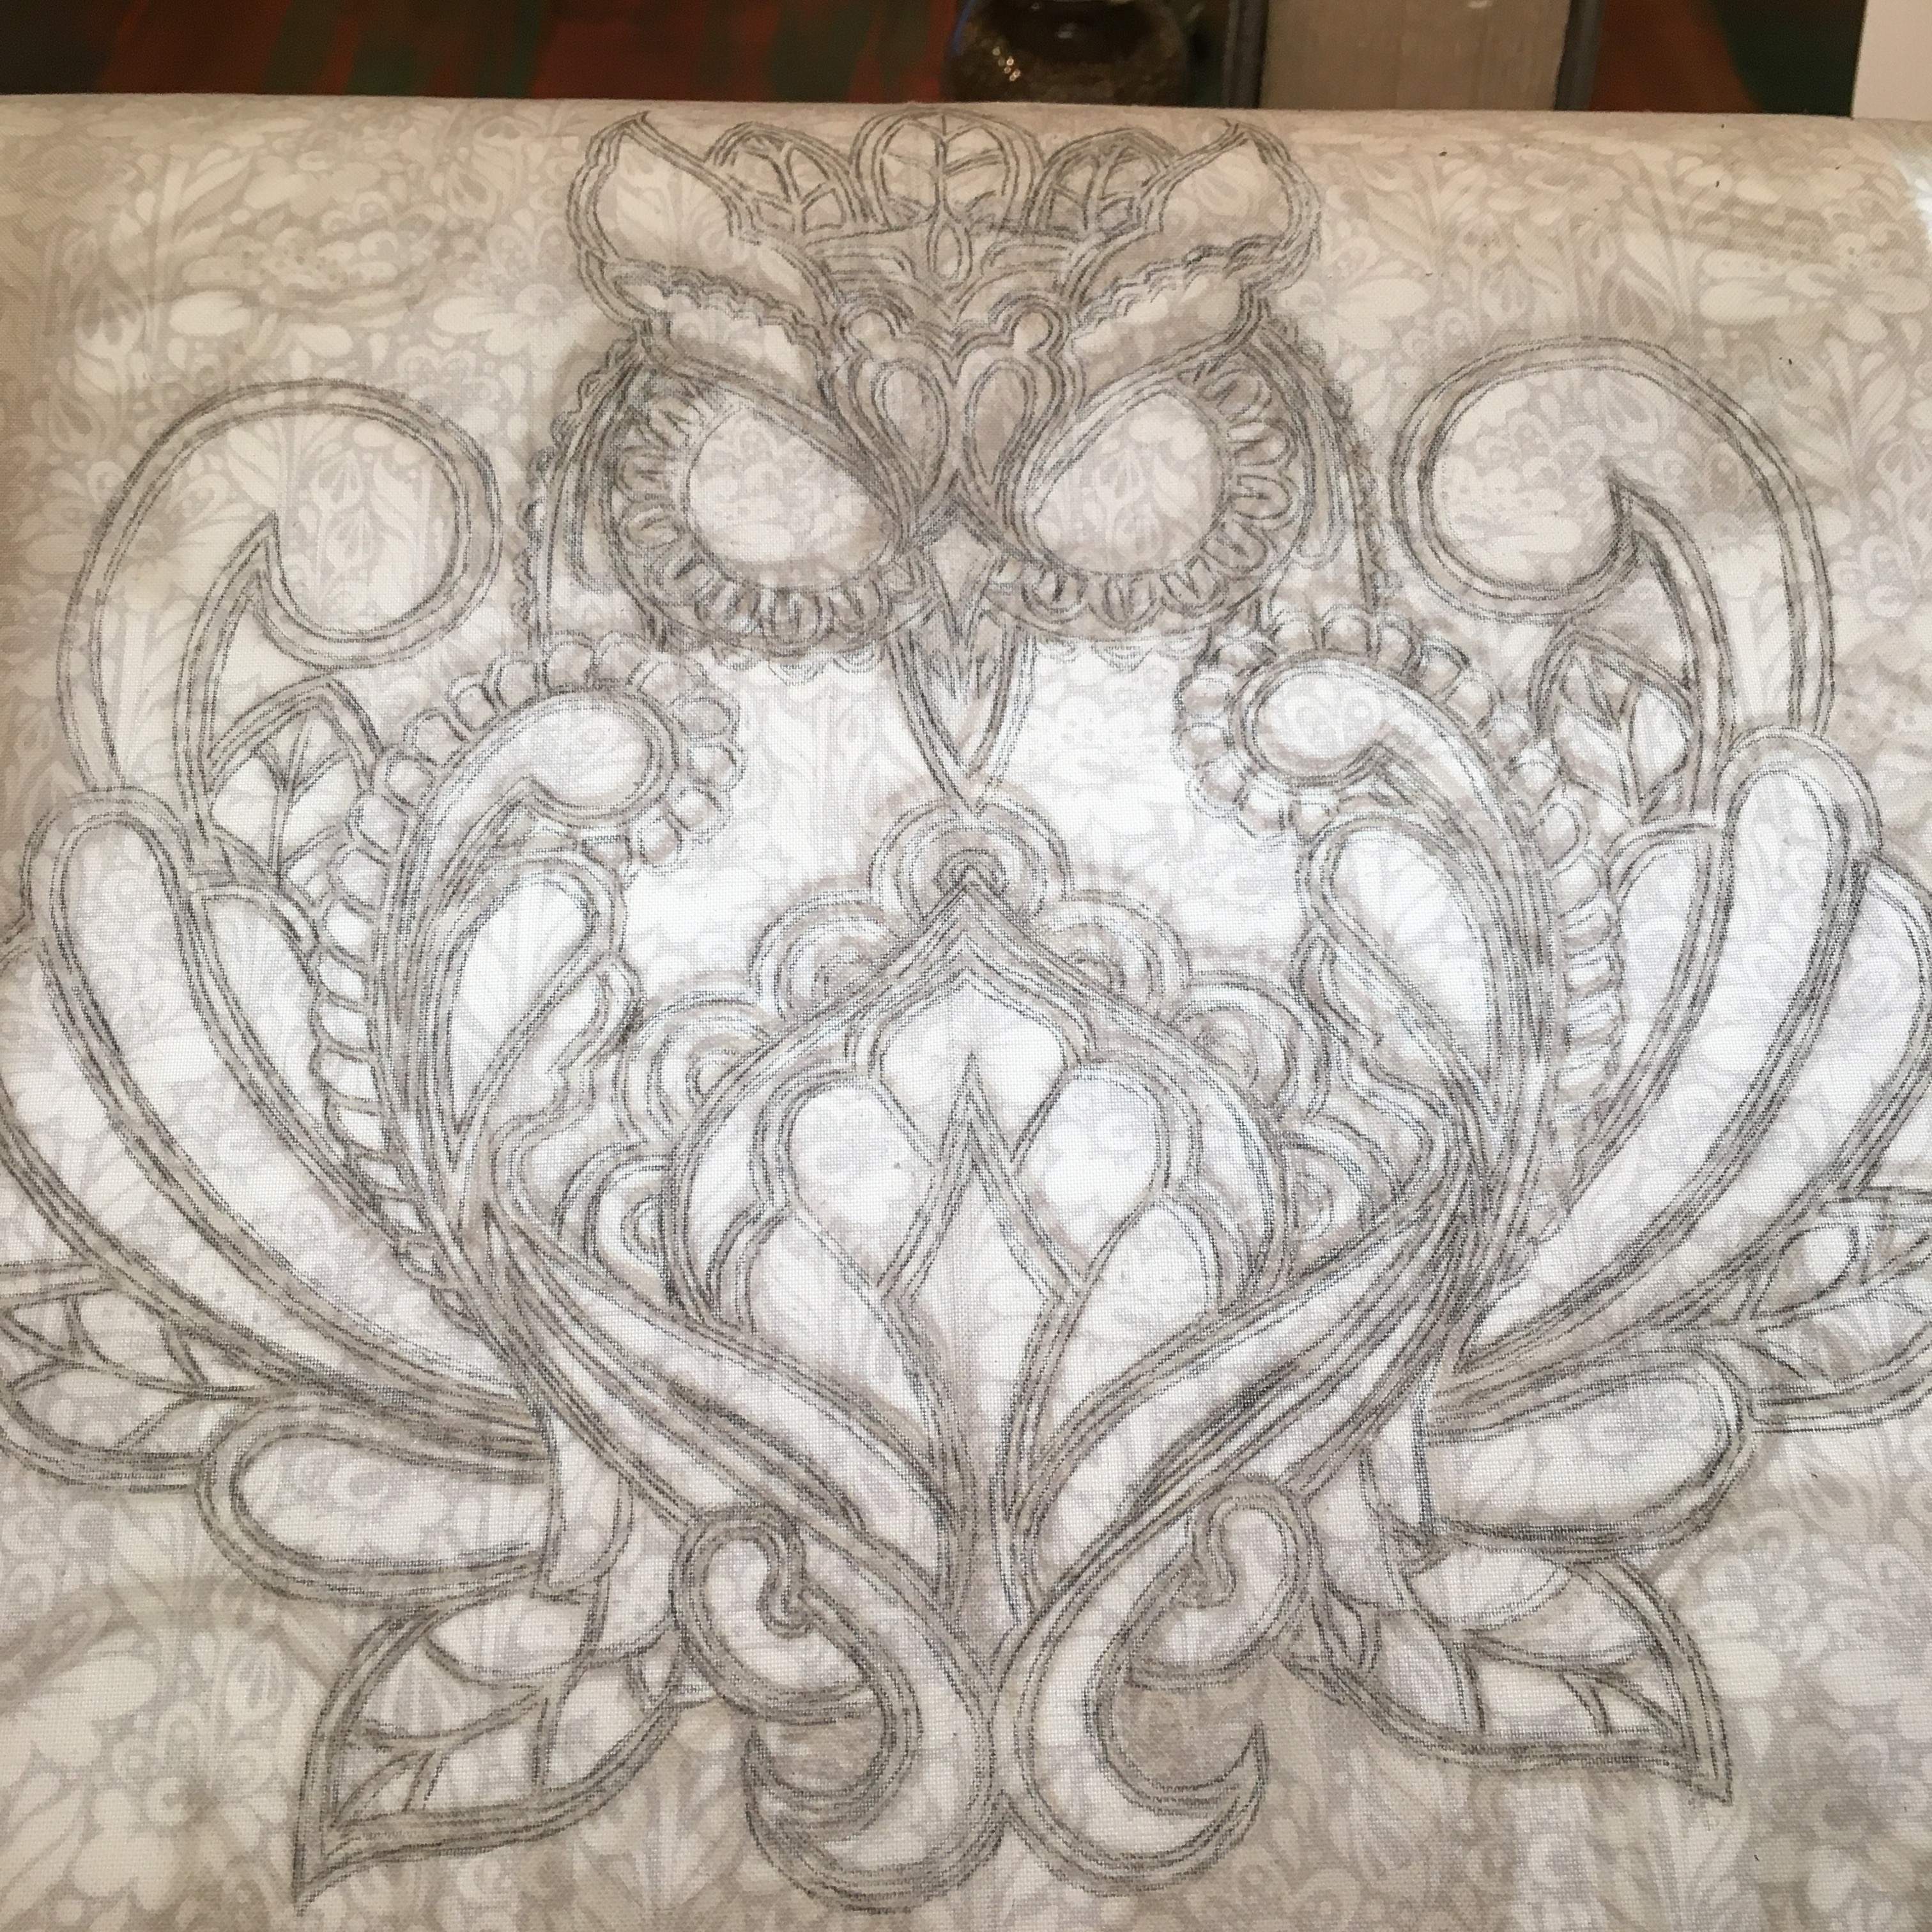
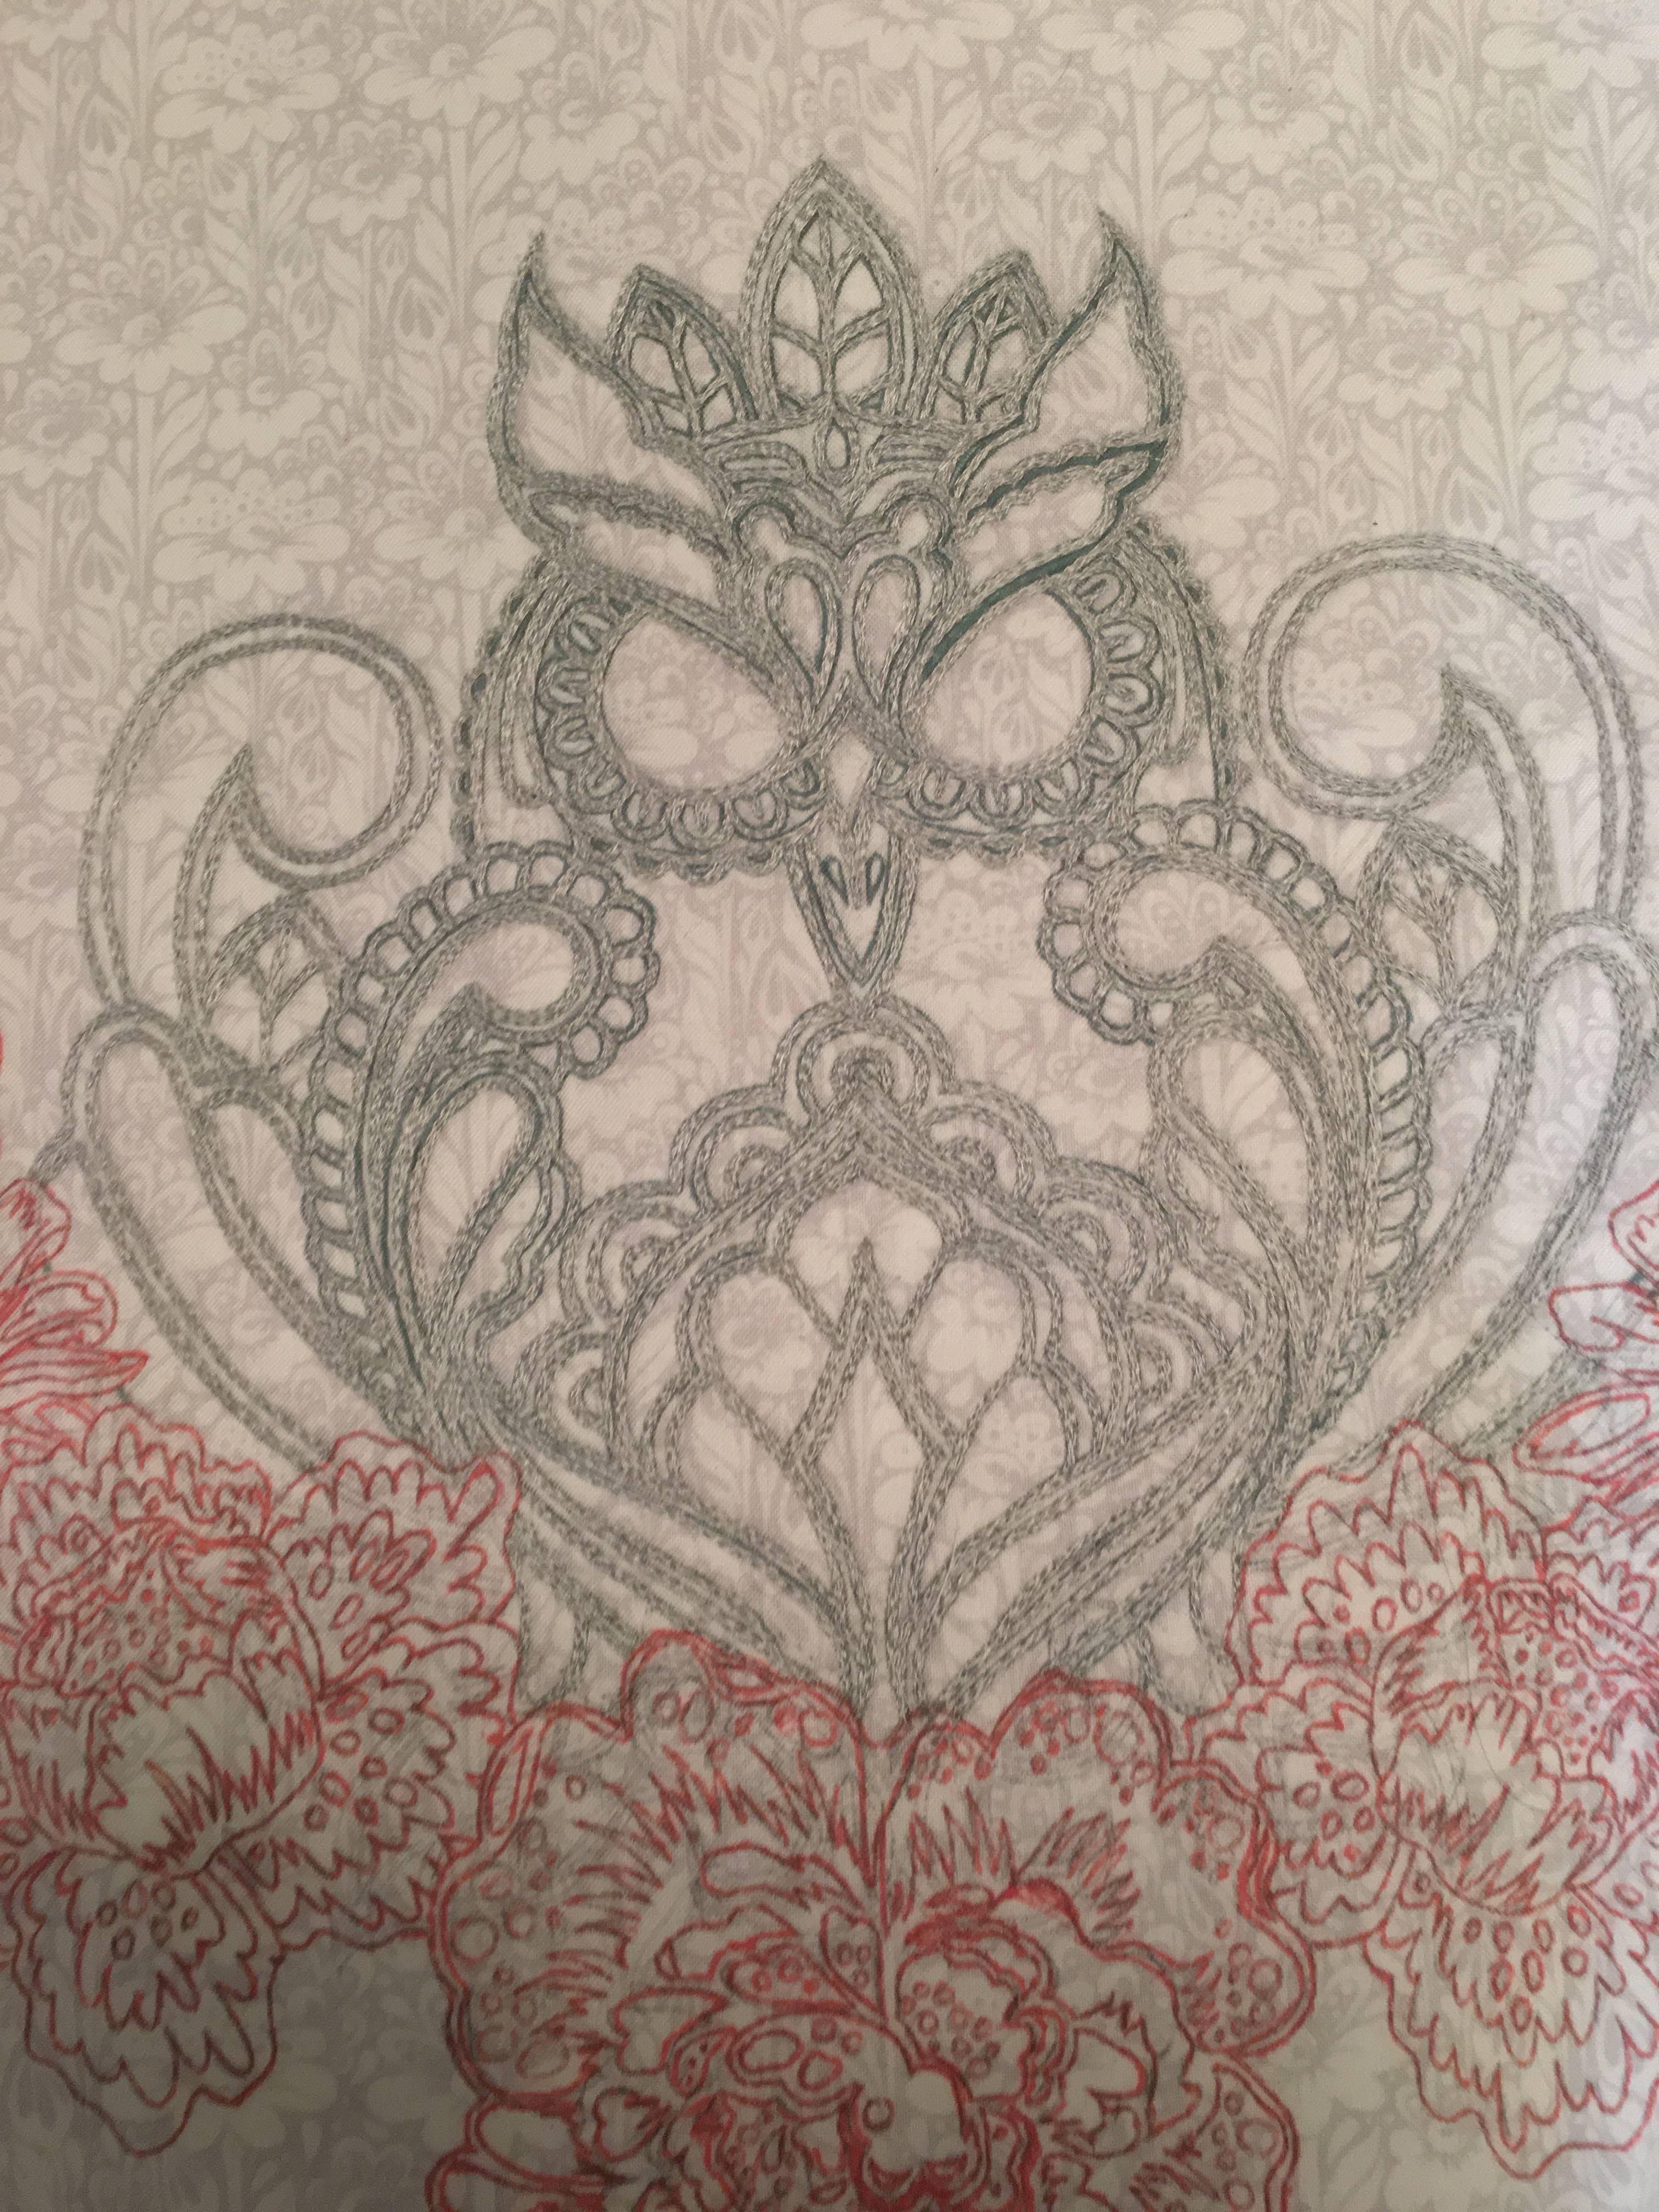
After adhering the Peltex 72F (double-sided fusible stabilizer) and SF101 to the back of the fabric I retraced the design with frixon pens. Now I was ready for the thread to arrive!

I was relieved to know the thread colors were very close to the colors I used in my design (because I had no idea what colors were in the collection when I made my design). Wow it is gorgeous!!
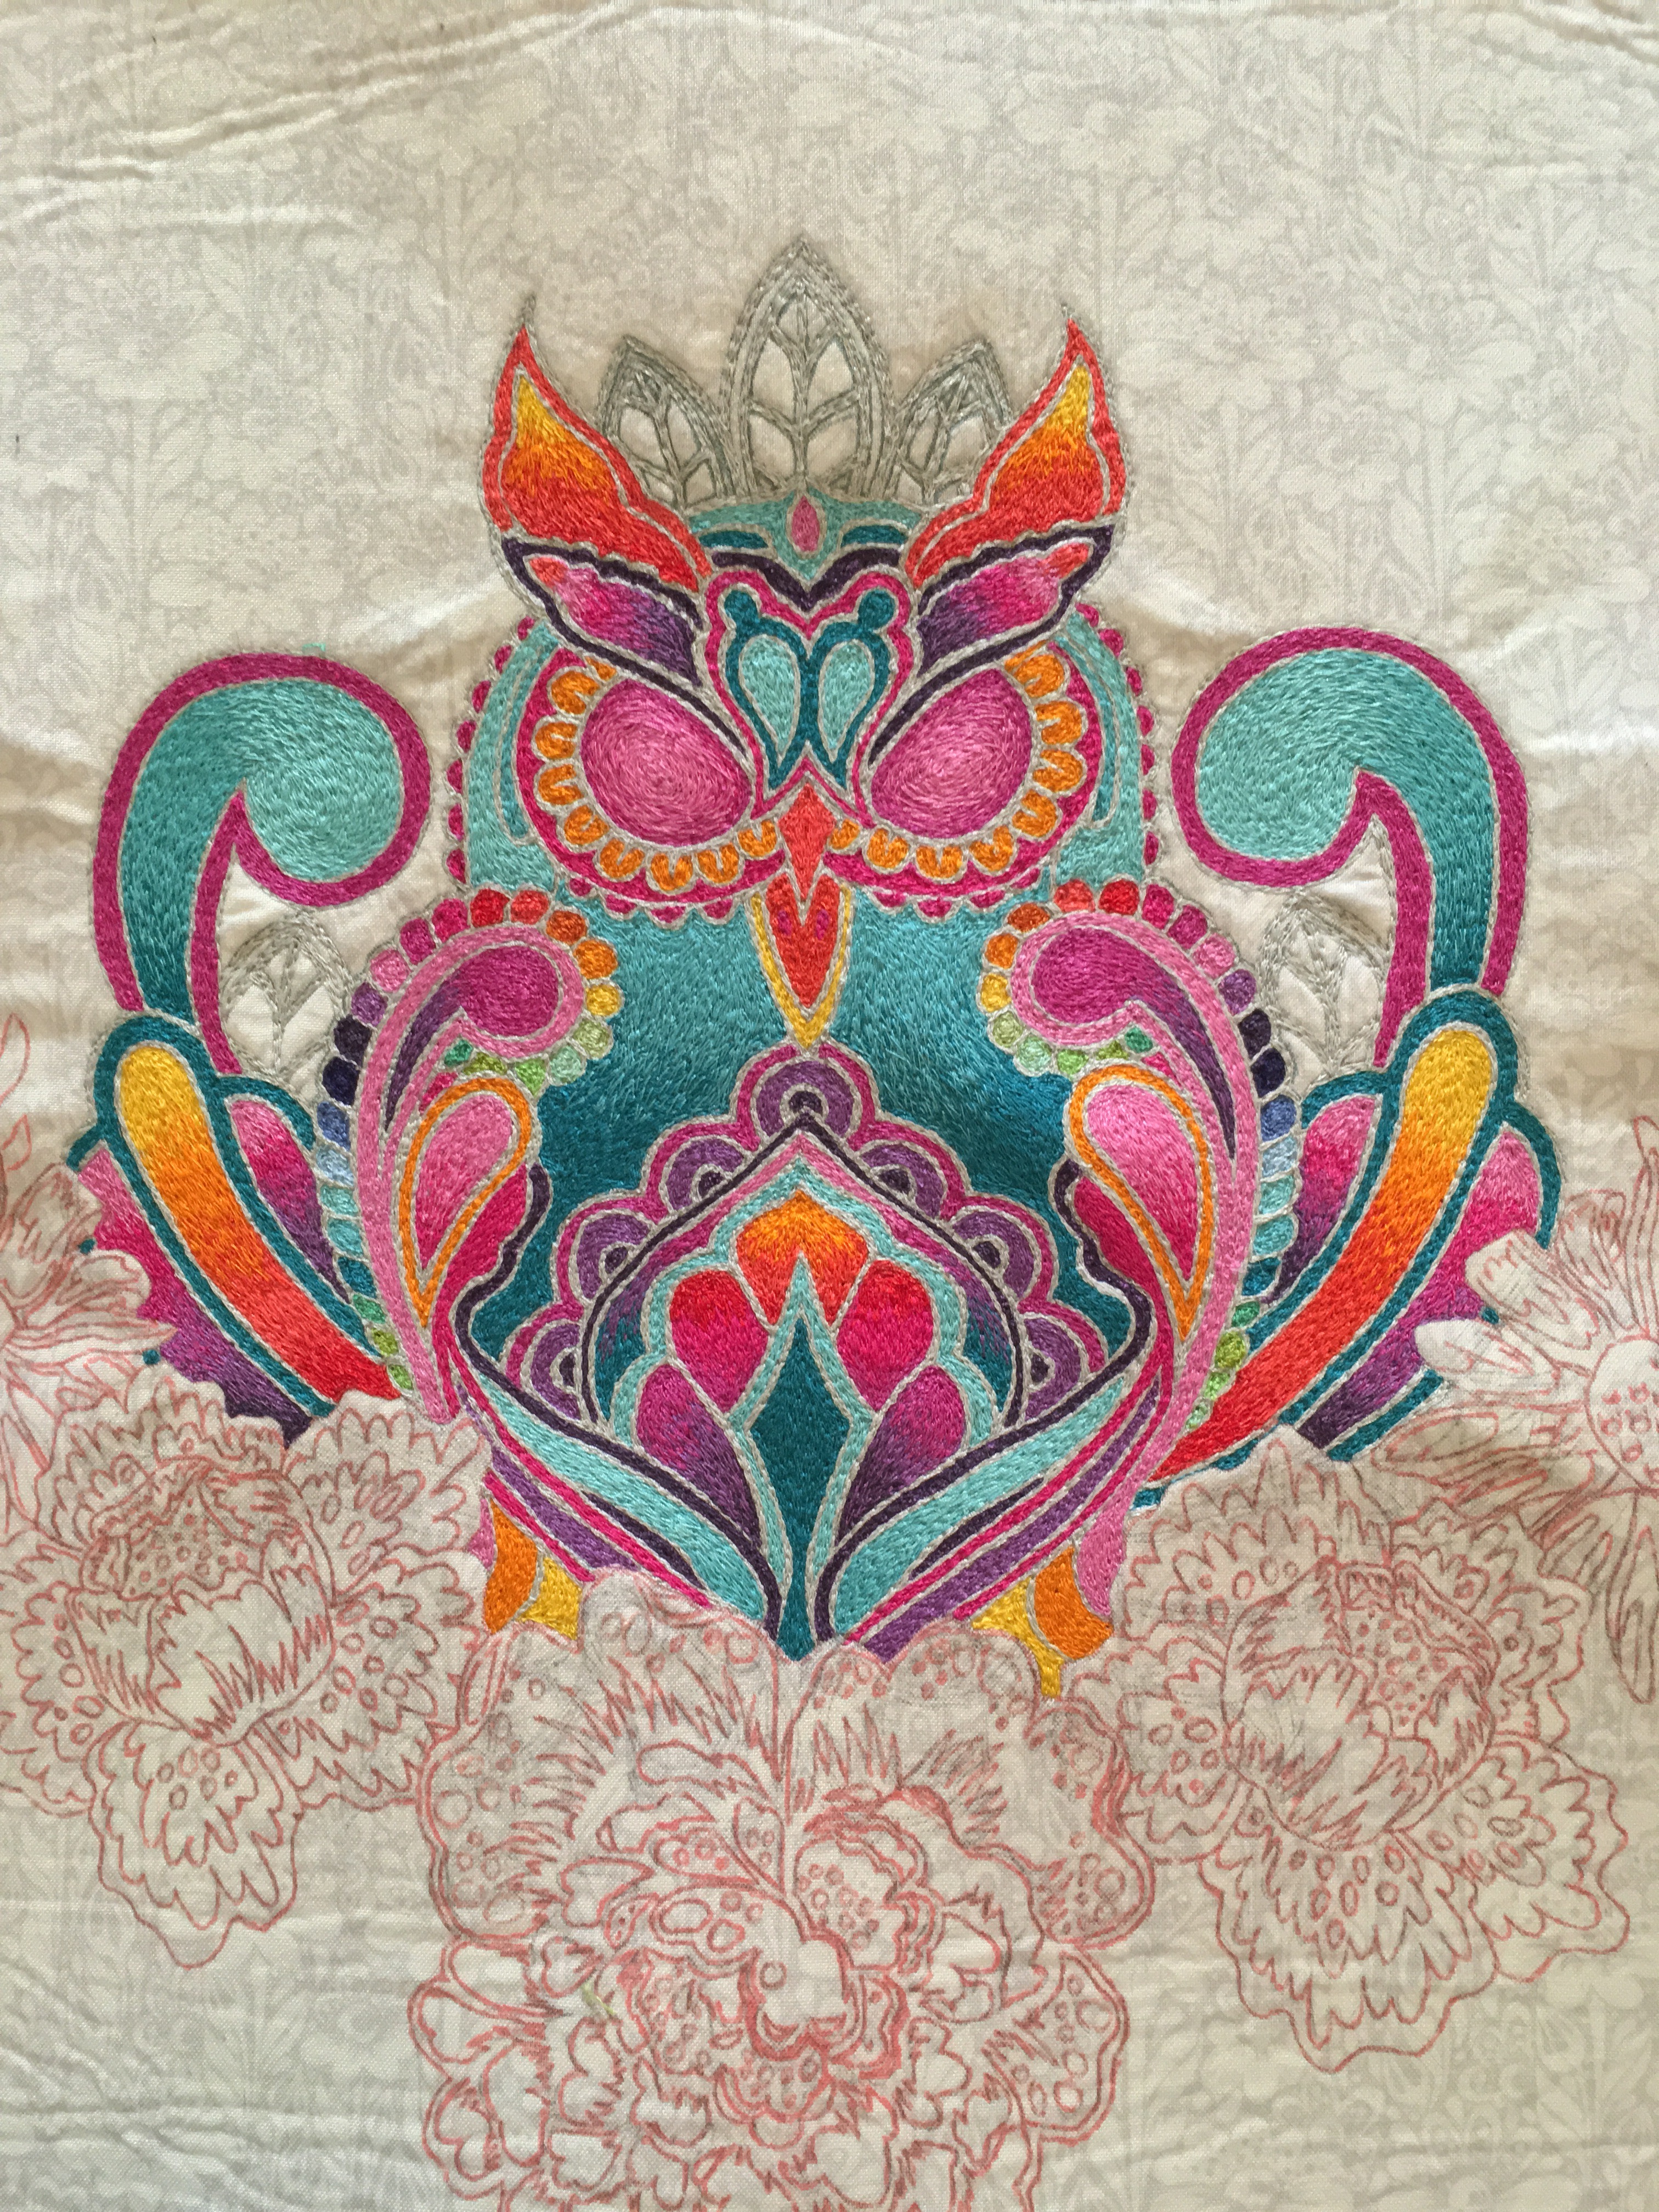
I began the actual thread painting in mid March. I started by thread painting the thin grey outline on the owl.
I began filling in the owl in all the blue sections. If they were ombré I always started by applying the darkest thread first and ending with the lightest thread. I was tired of thread painting blue and was so glad when I could move onto all the pink/purple sections.

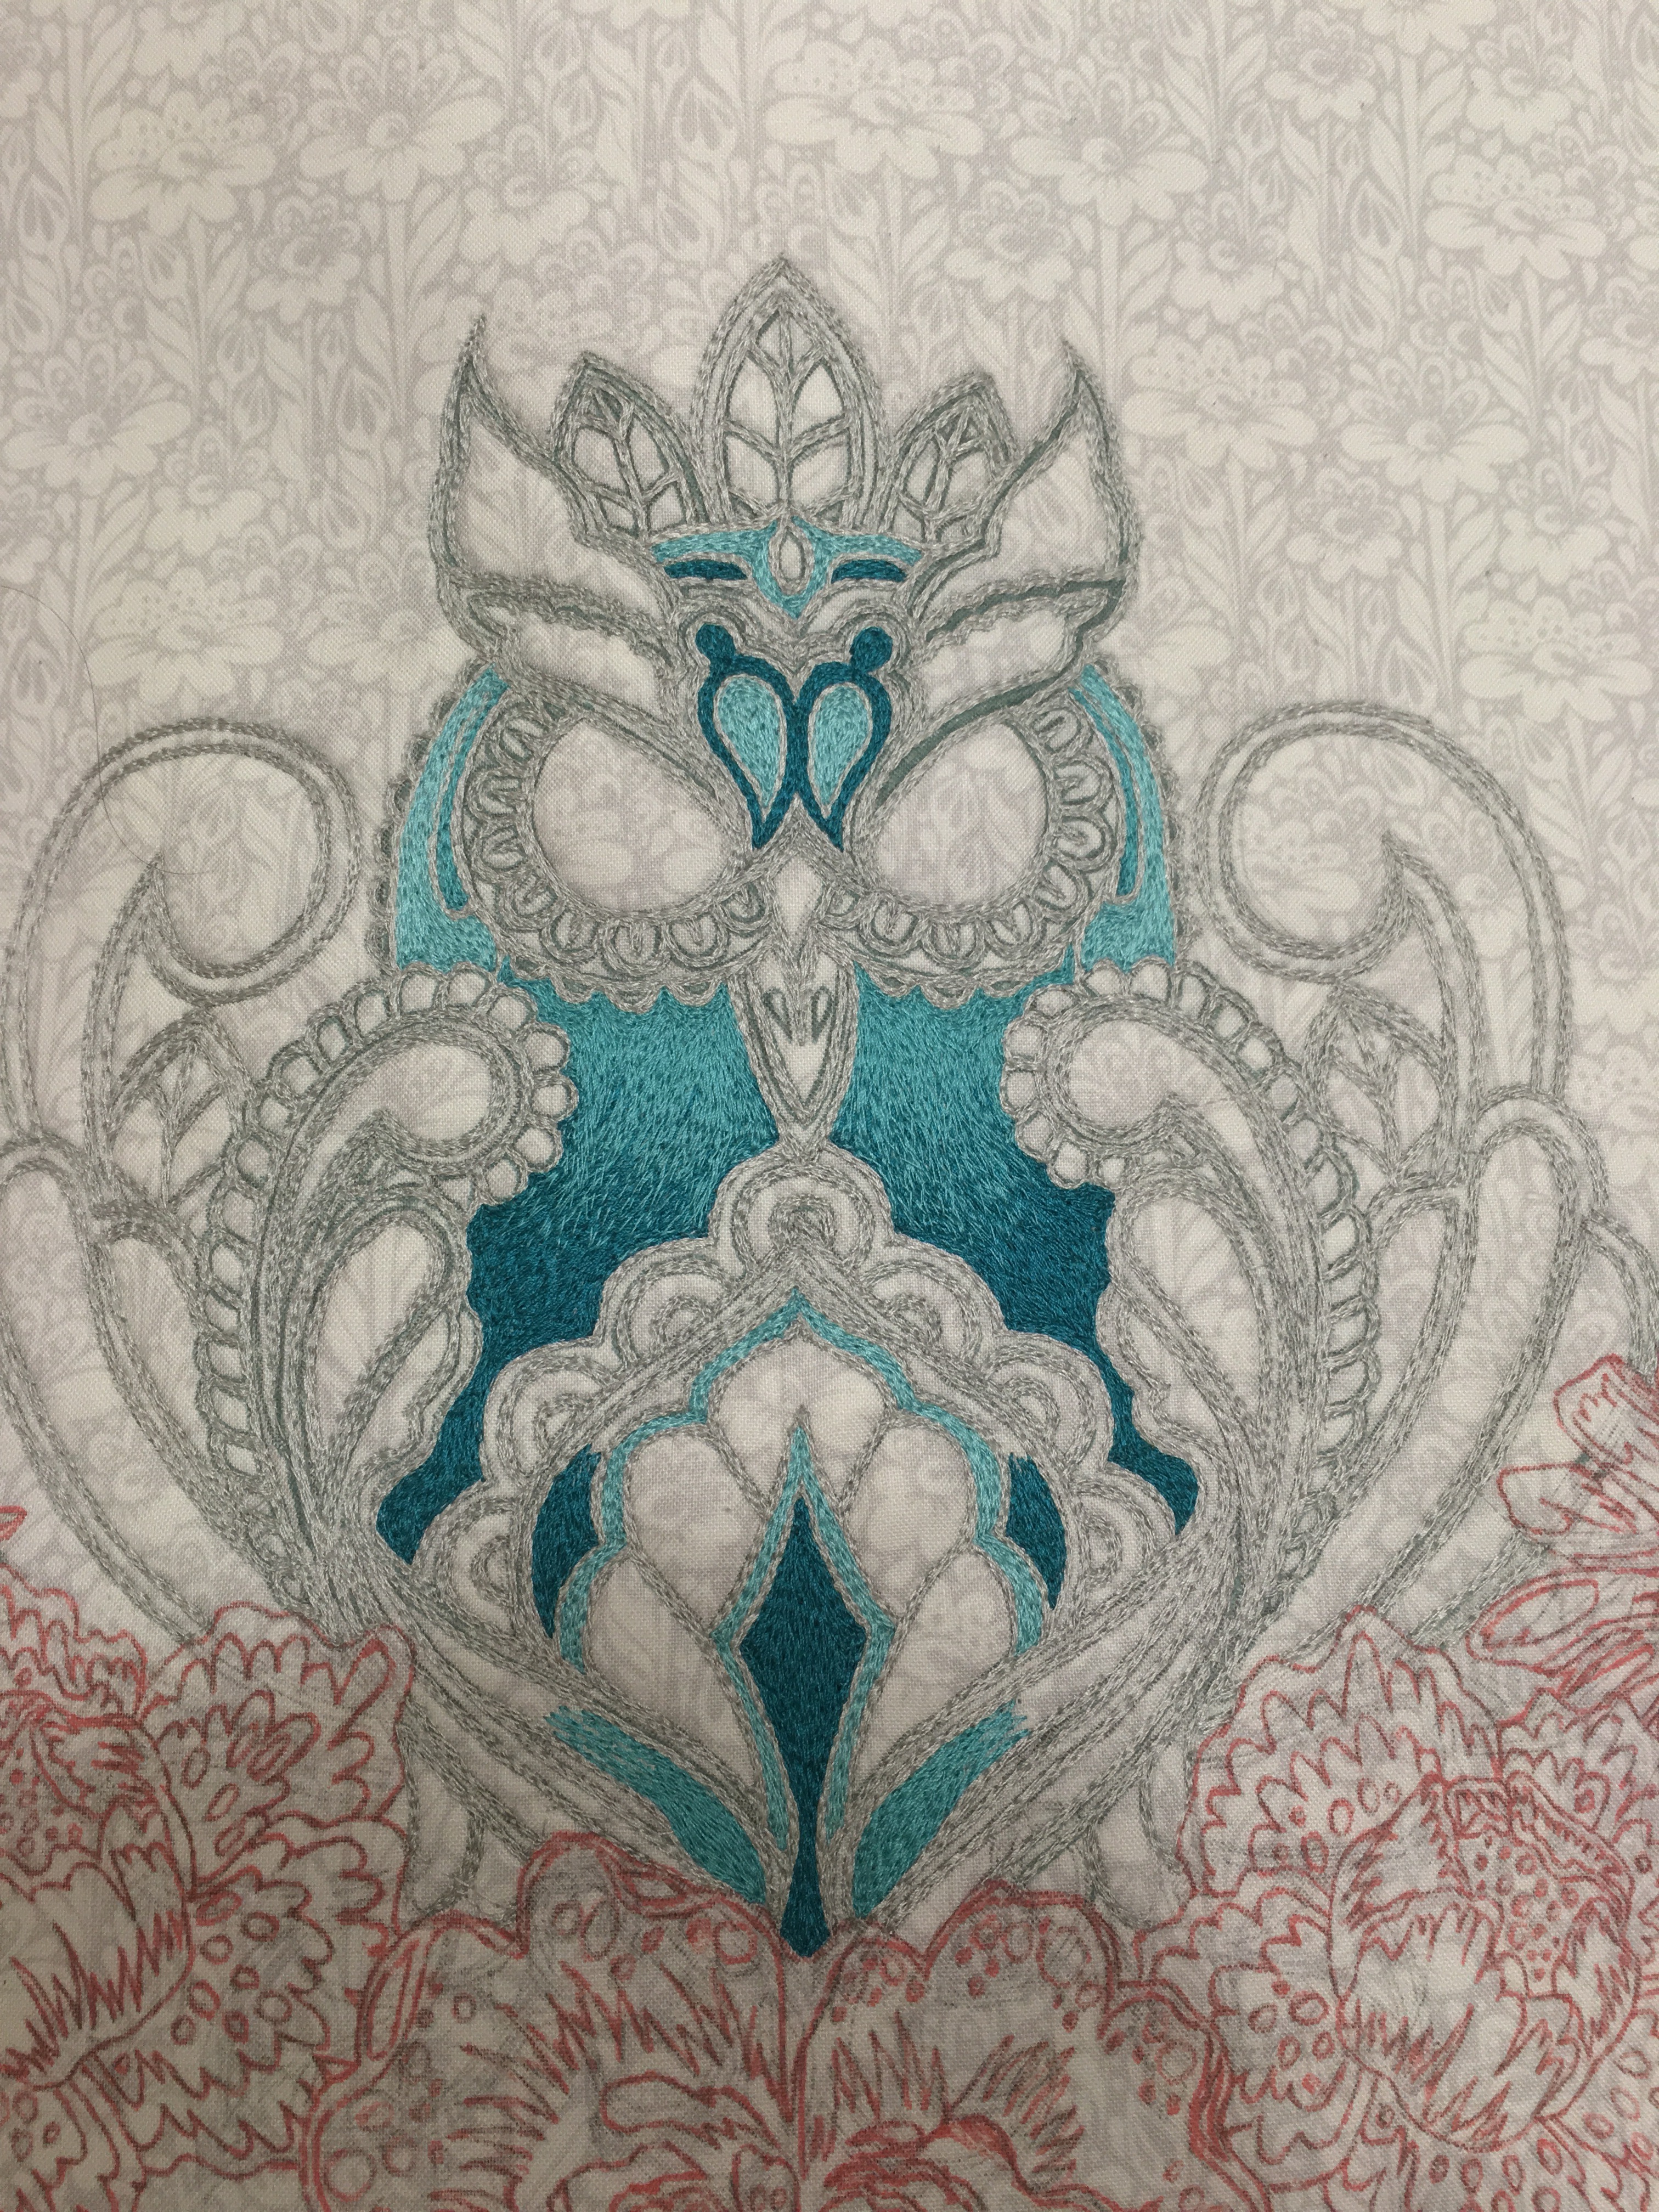
I filled in the pink and purple sections and even the smallest sections near the eyes. Whew, those were tiny sections that only needed 4-5 stitches to cover!

Next, I added the coral, orange and yellow accents.

Now to add a gorgeous rainbow of color around the paisleys (which means 24 different thread and bobbin color changes!) But I absolutely love it, it’s one of my favorite parts of the thread painting.

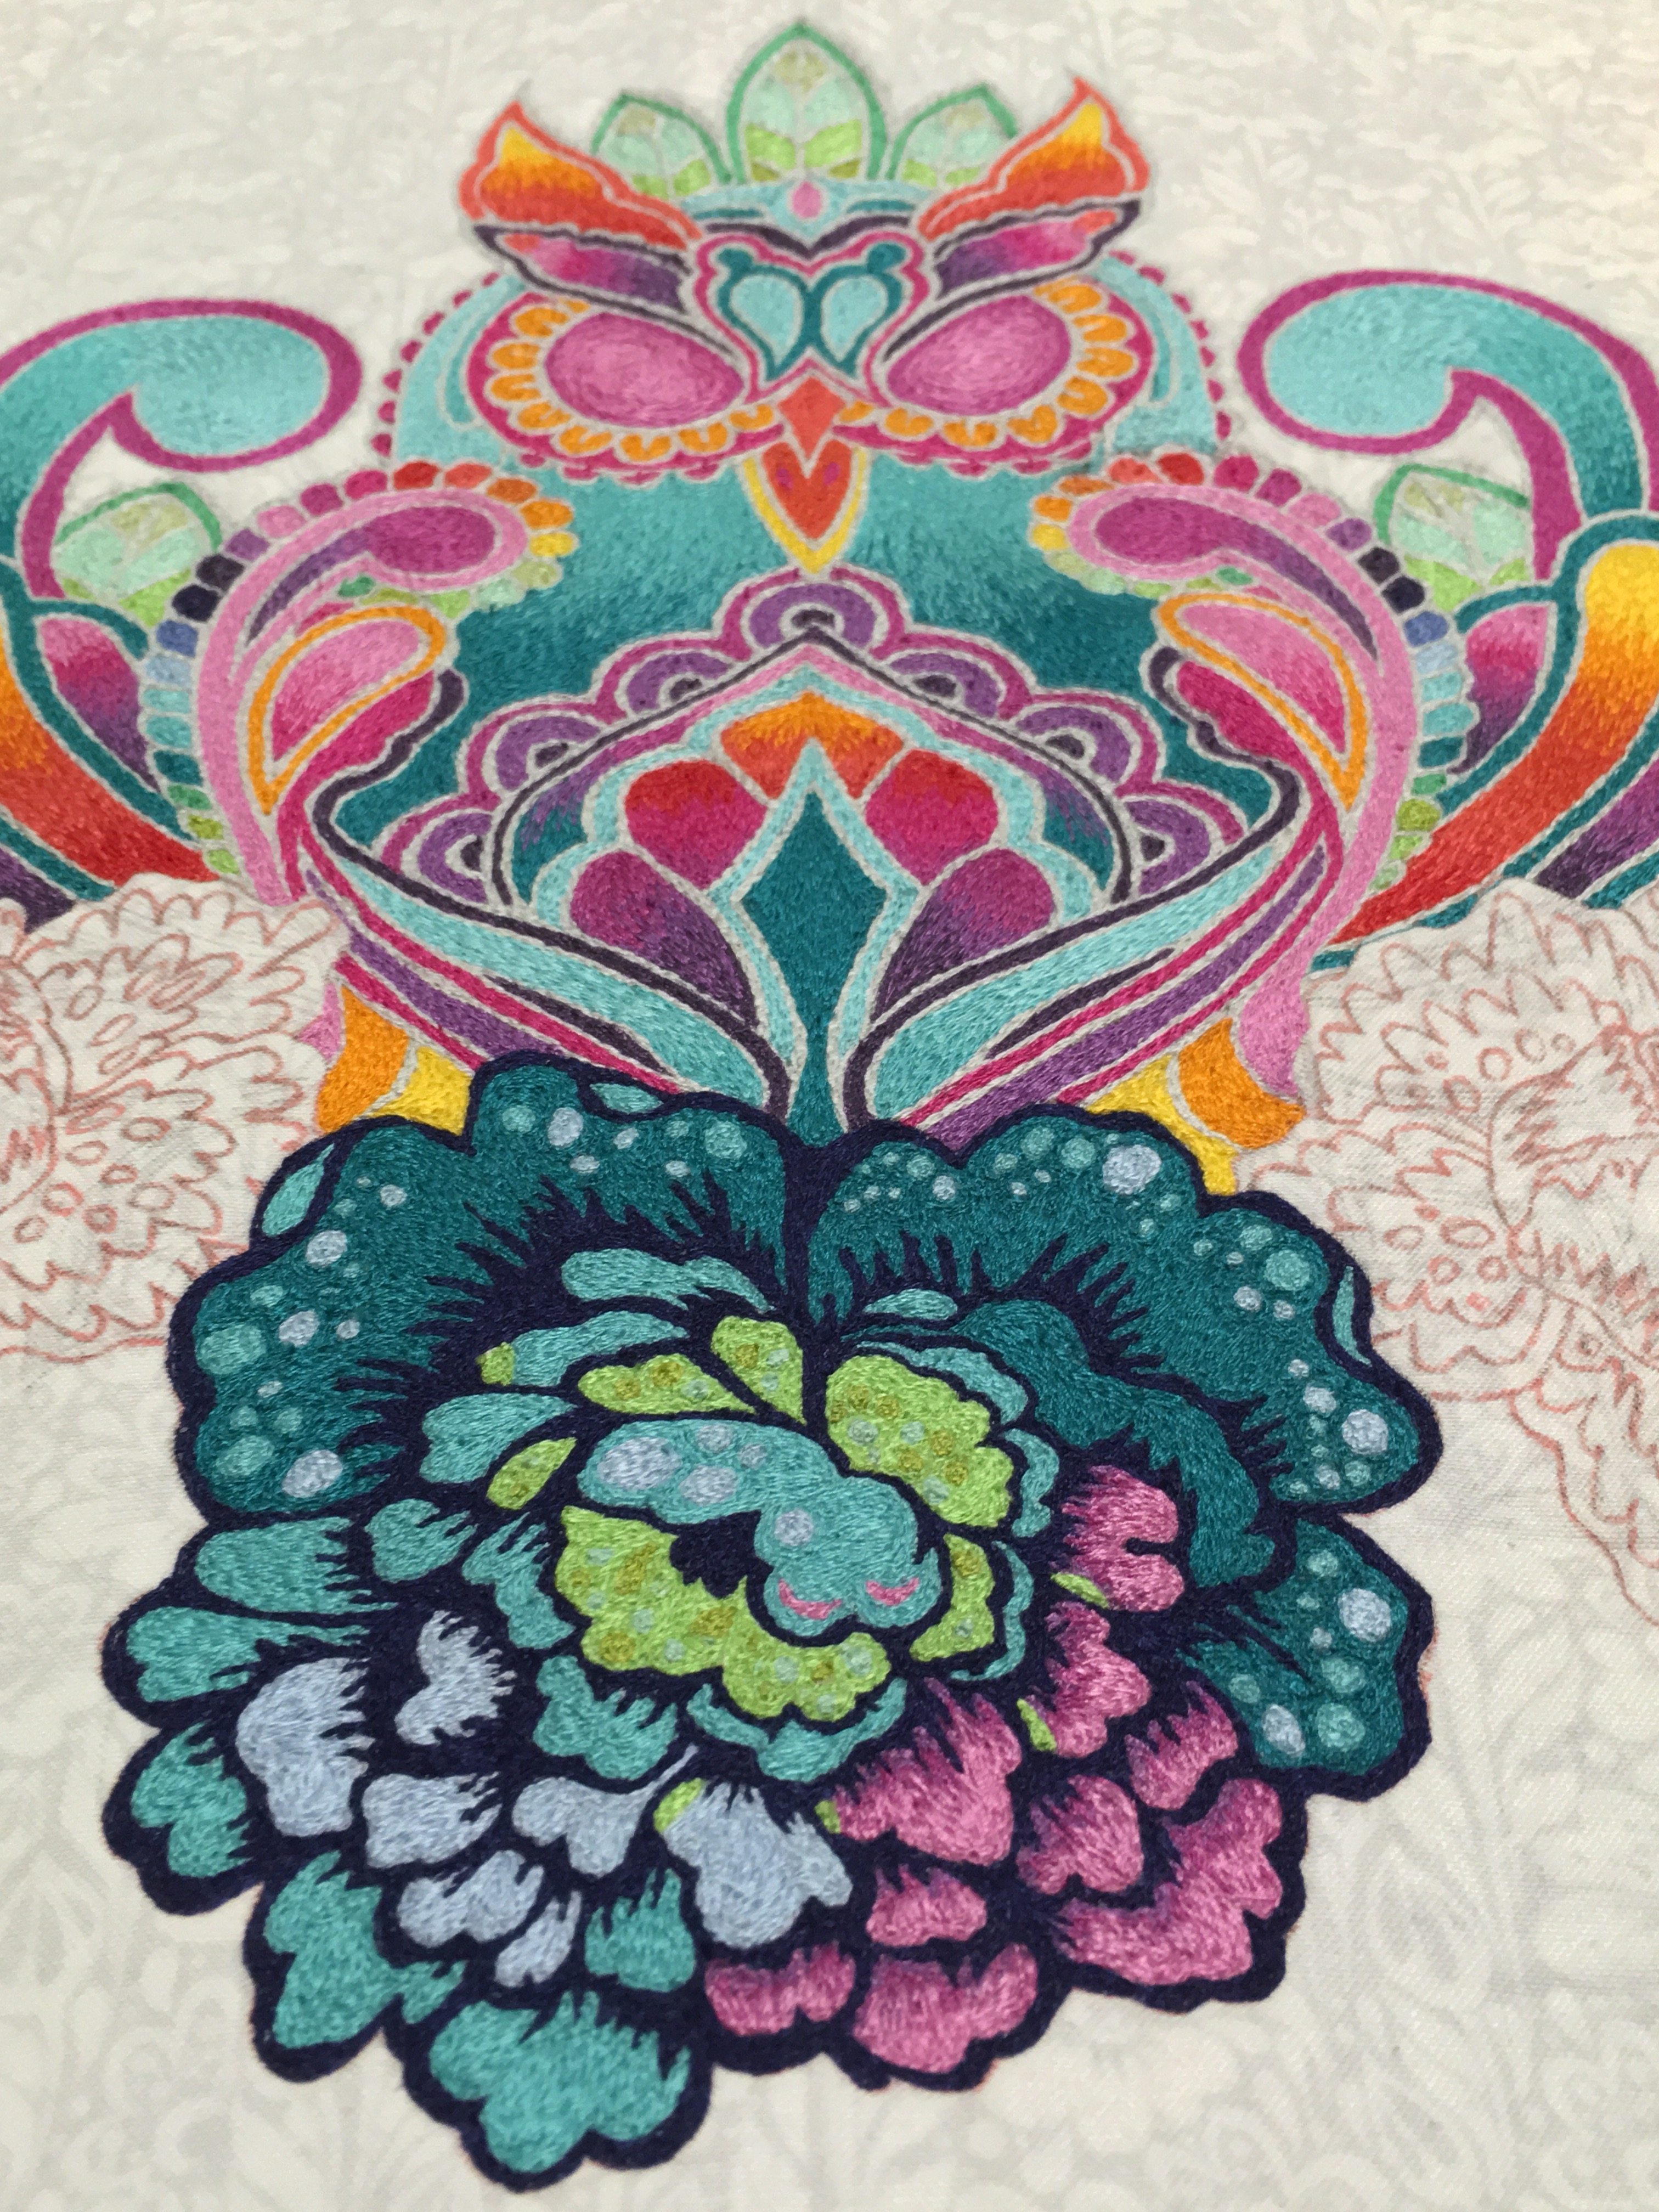
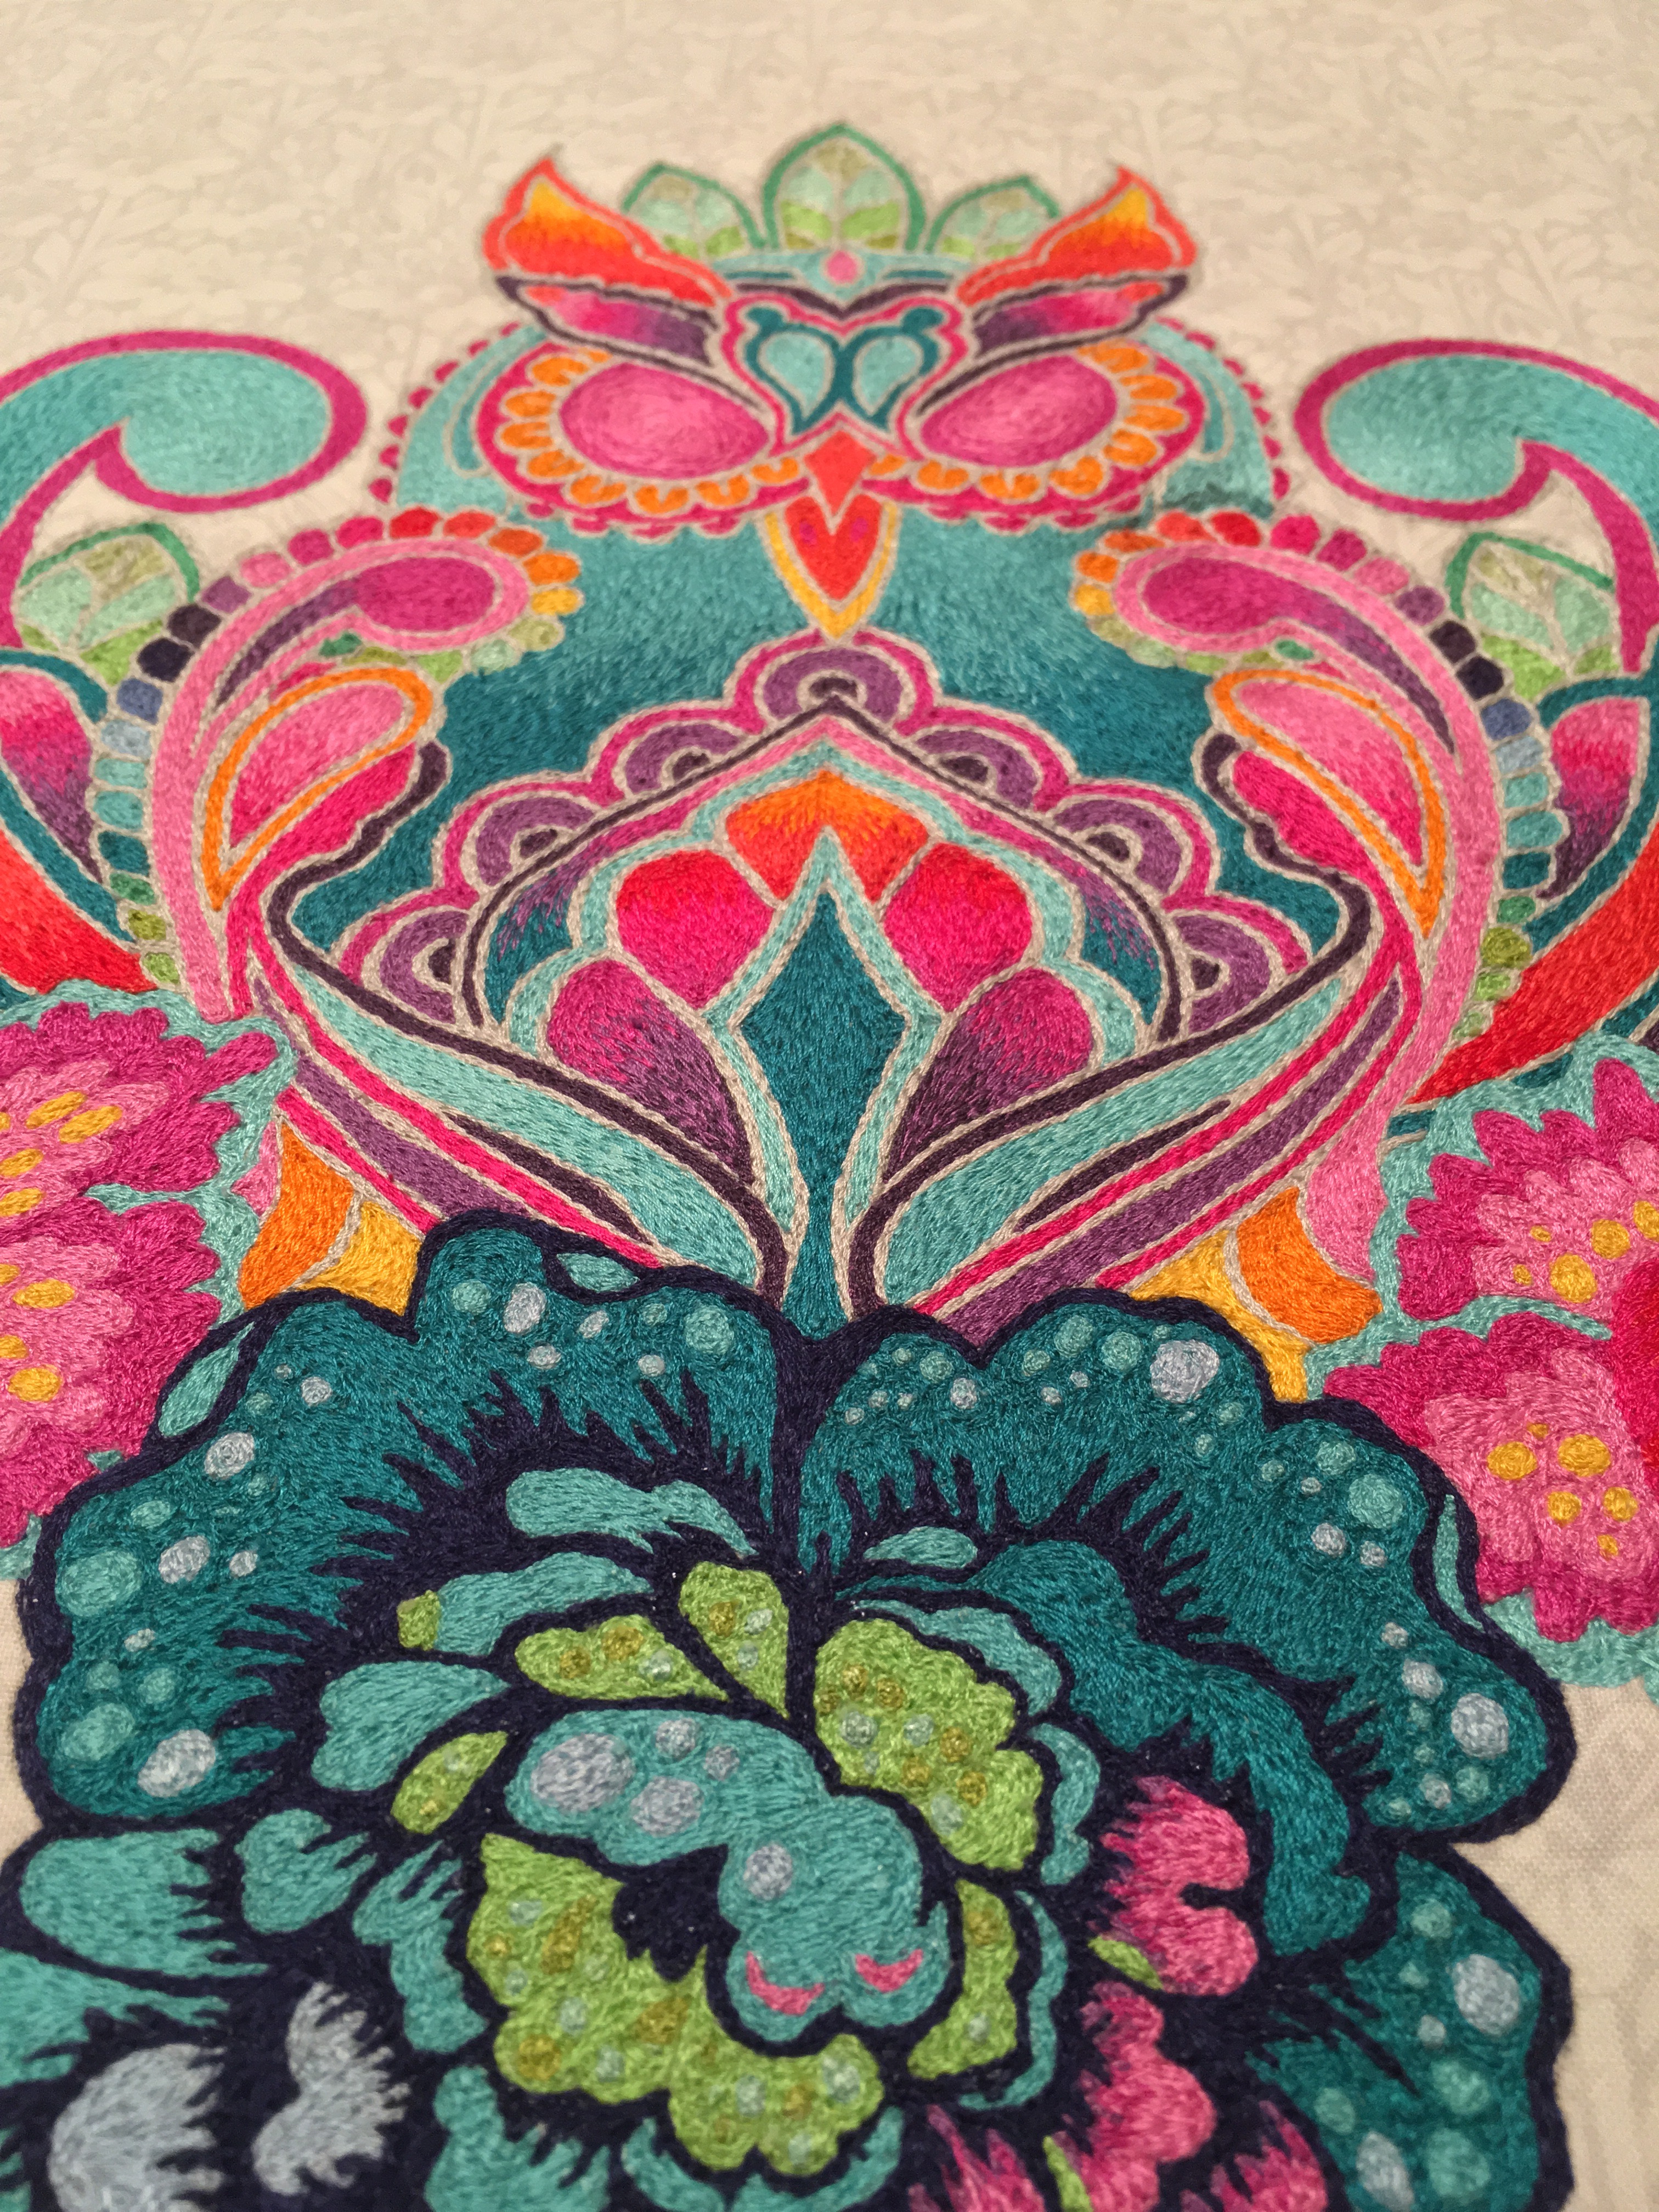
Next up was the green leaves around the side and head of the owl.

Time to start the flowers! For the middle flower from Elizabeth, I chose my darkest colors, navy, purple, and dark pink. I started thread painting the petals first instead of the navy outline. By doing it this way the dark thread of the outline can go over and hide any imperfections in the petals. I love how the dark navy outline makes this flower appear to be popping off the fabric!

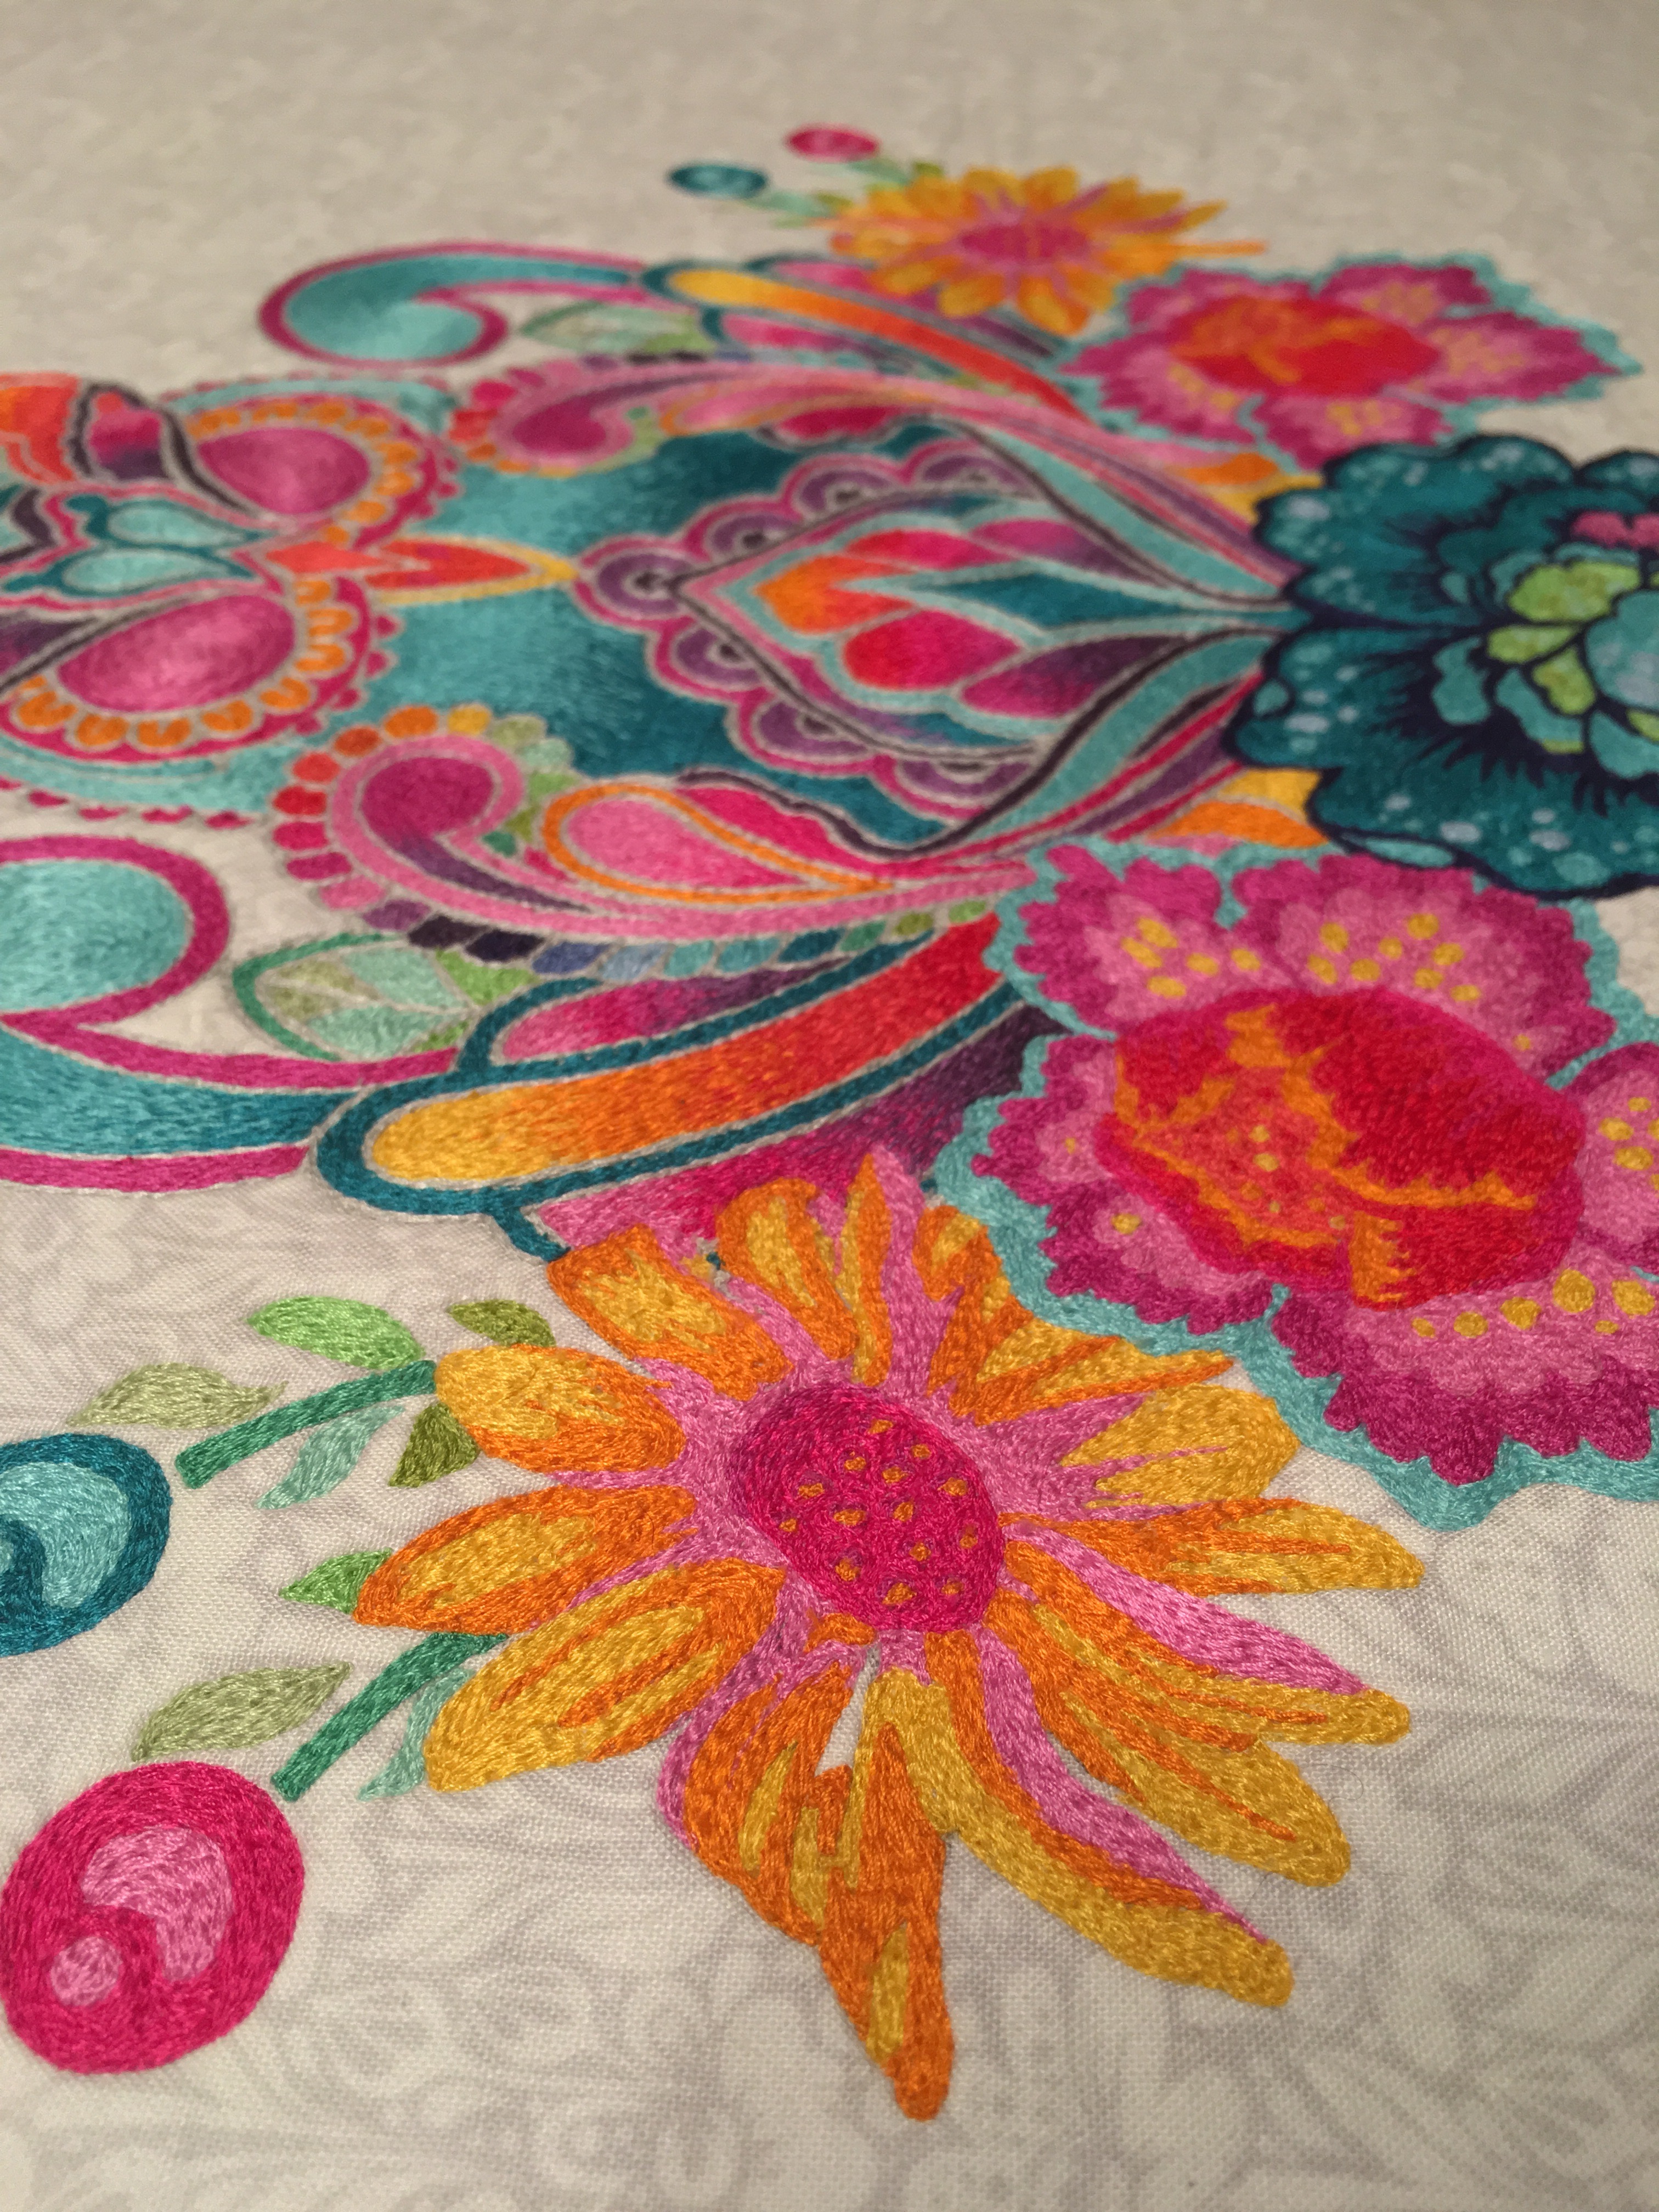
I moved on to the flowers from Chipper in pink, coral, and orange with hints of blue and yellow to transition between other flowers.

For the flowers from Moonshine I thread painted them in yellow and orange with hints of pink.
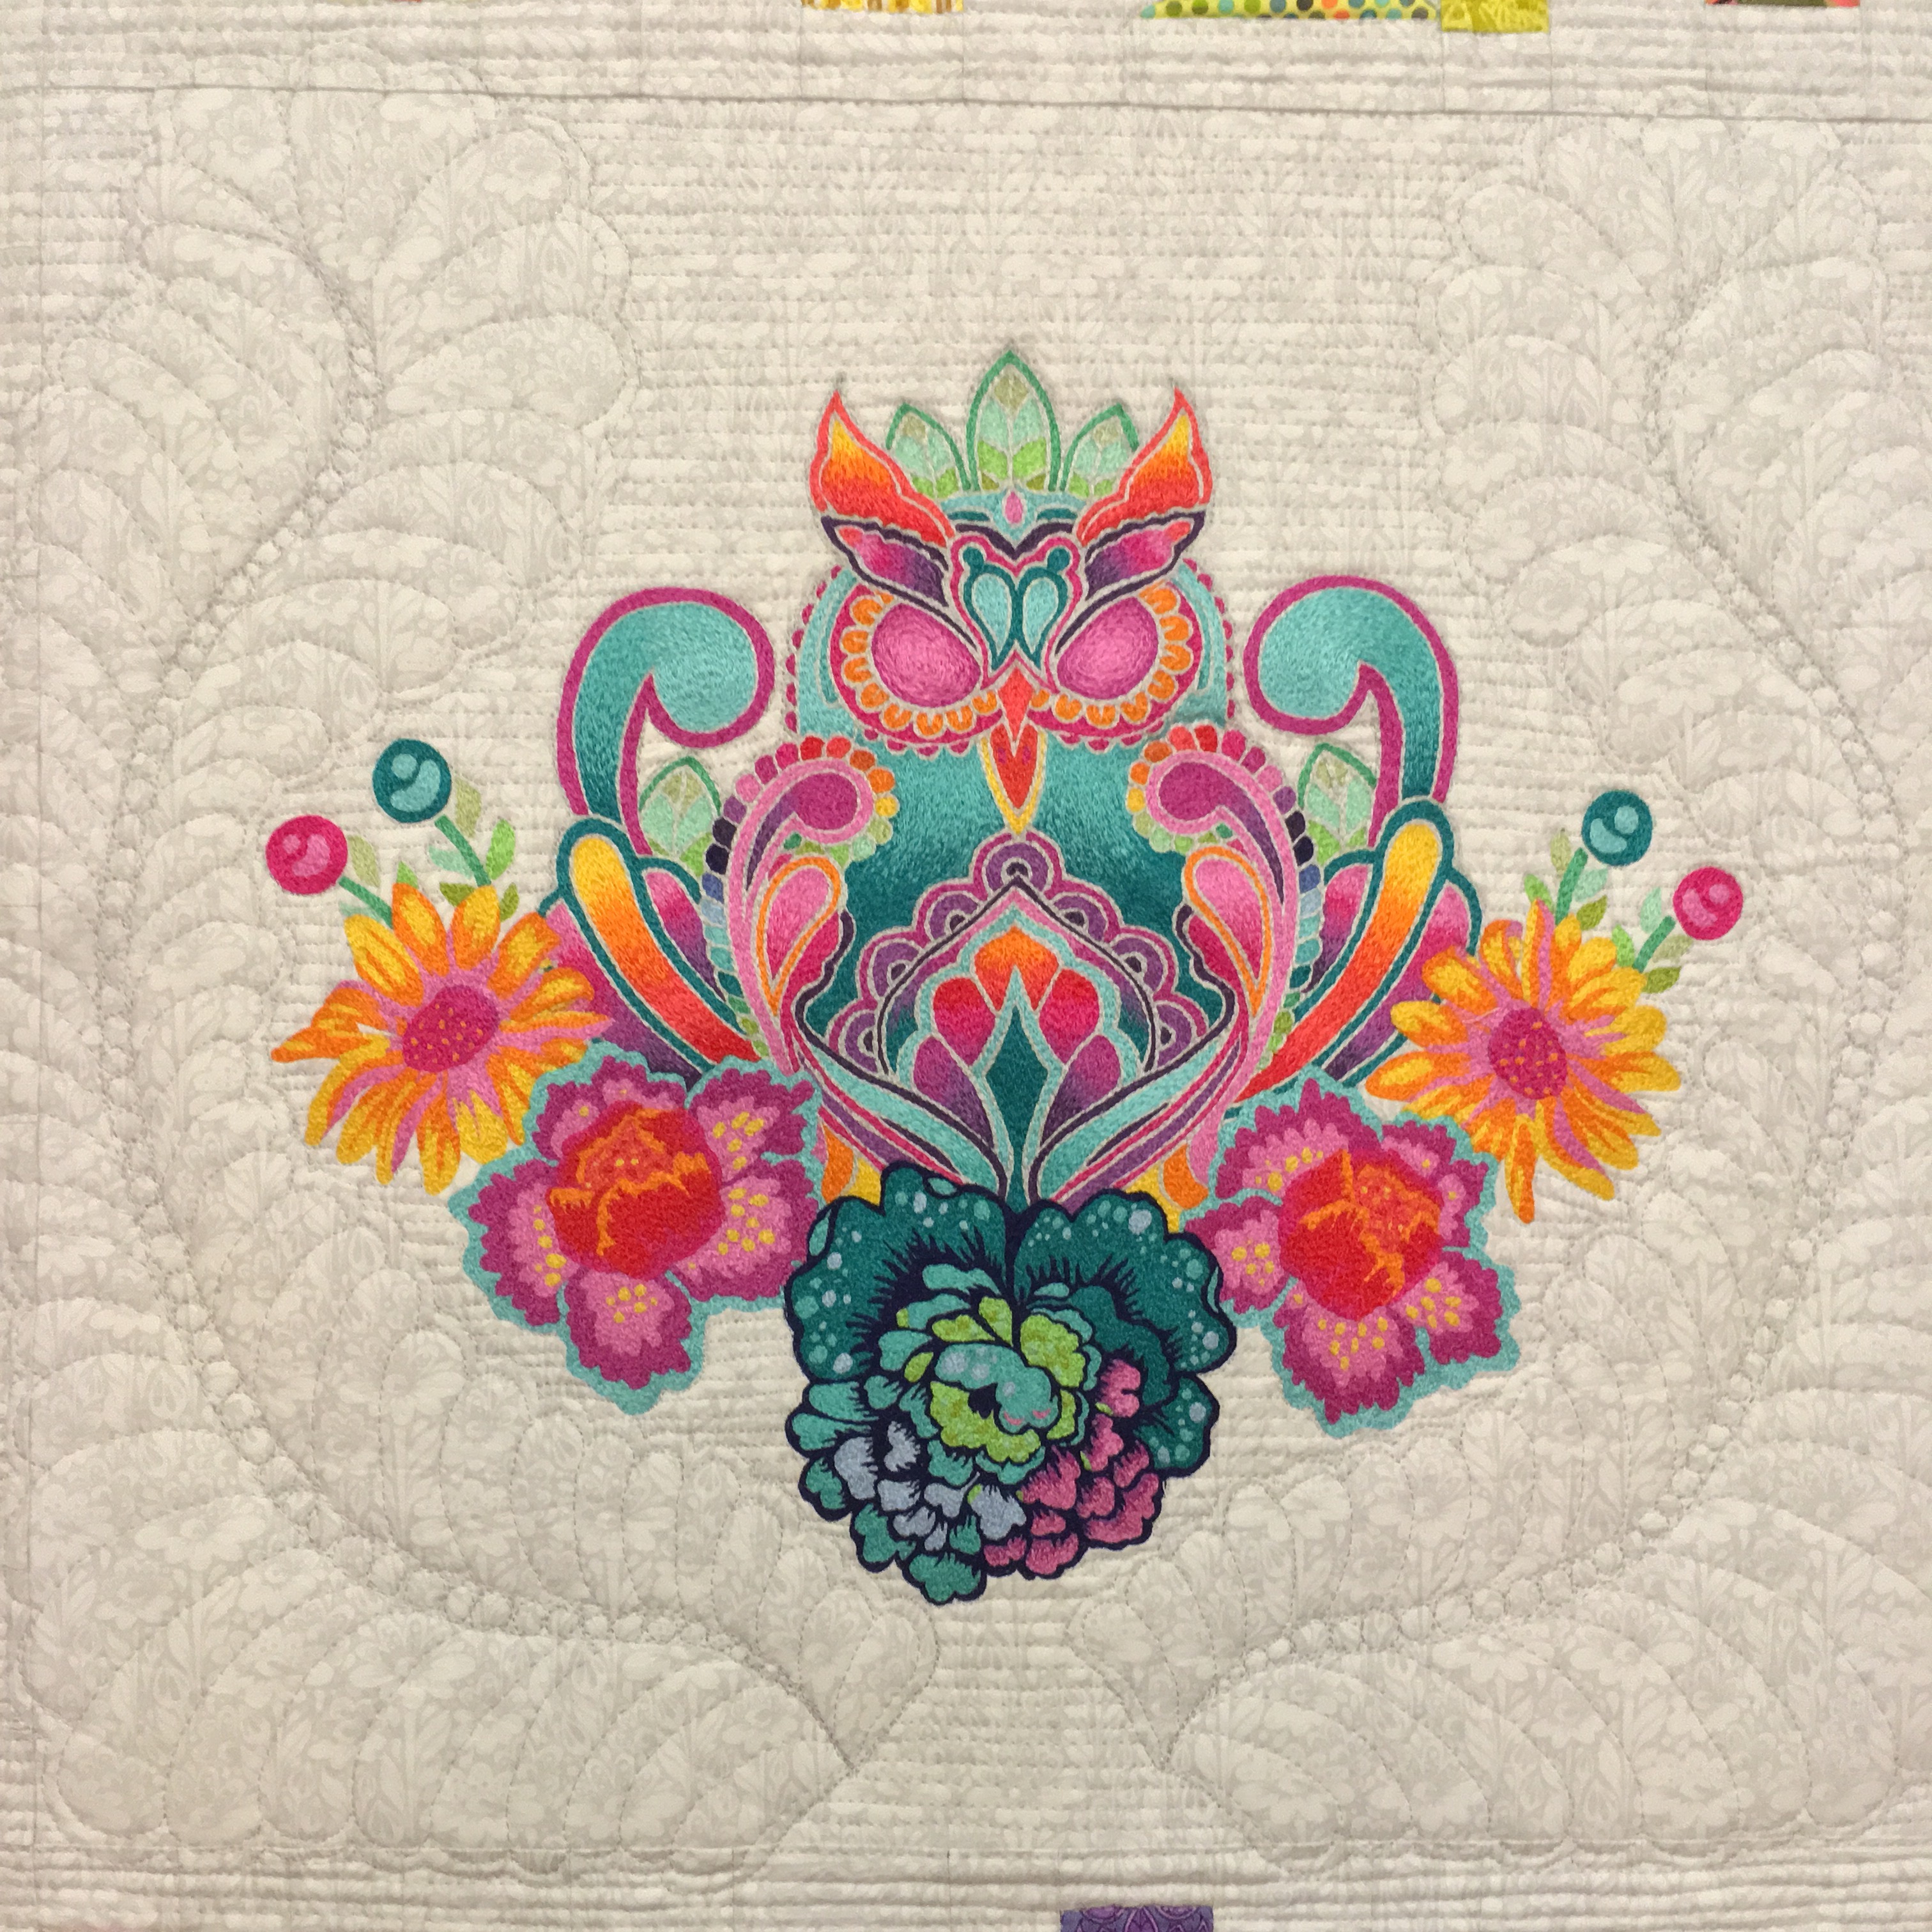
Now the thread painting was complete! It took me almost an entire month (on and off) to thread paint just the owl. In total it took me around 50-60 hours to thread paint the entire design.


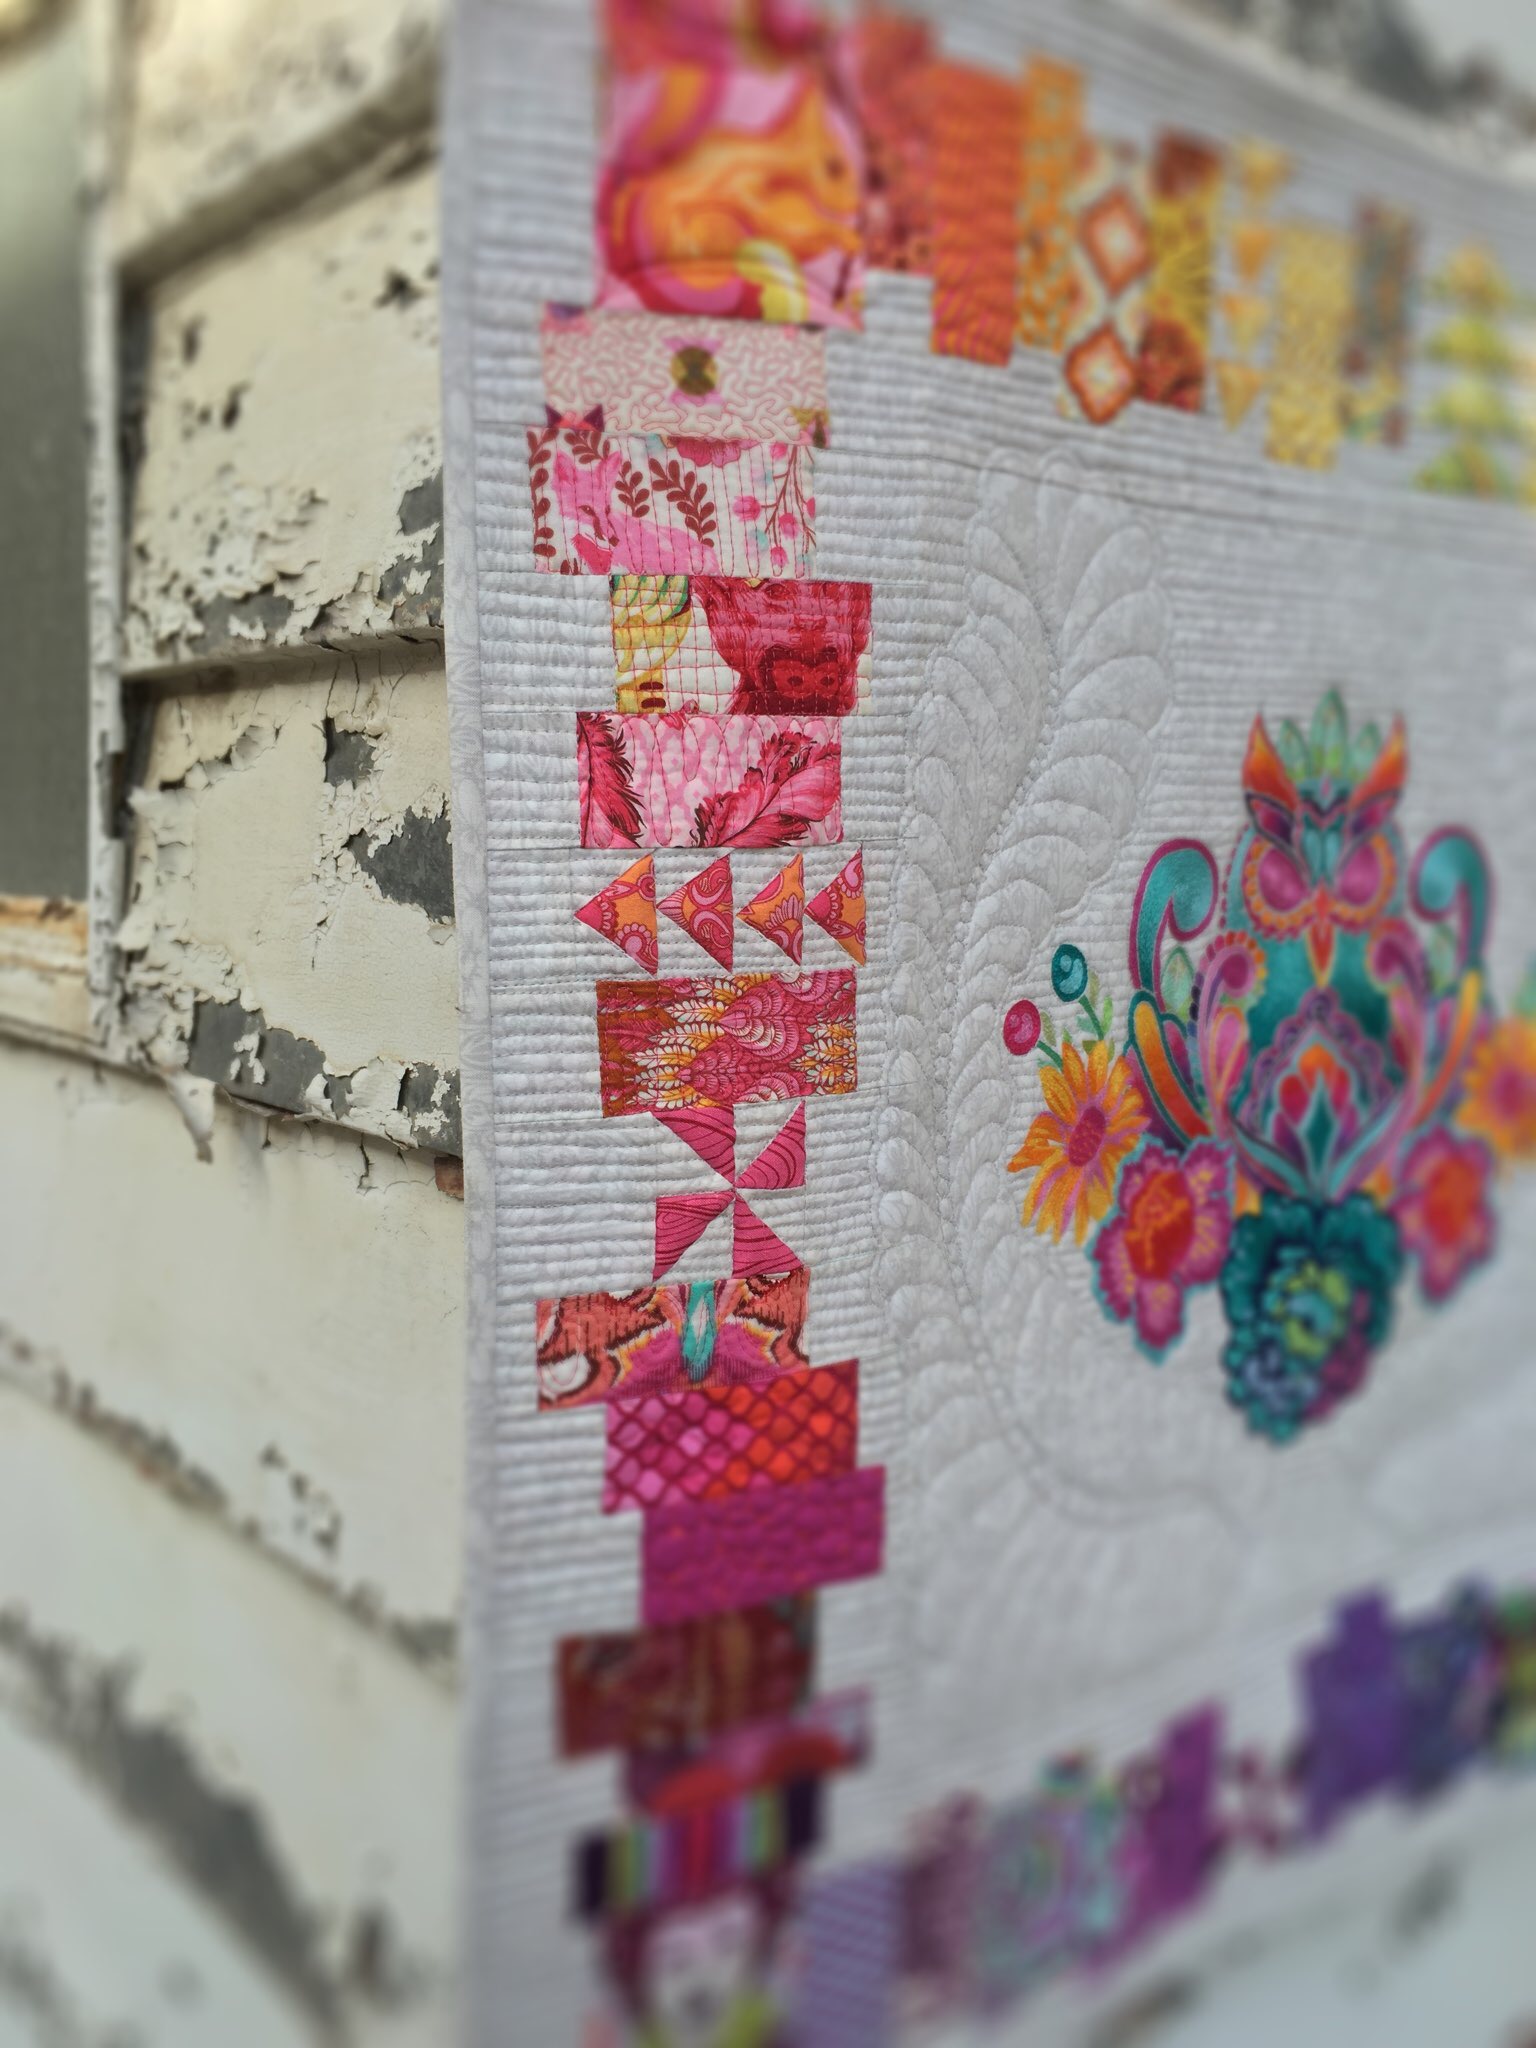
I had 2-3 weeks left to piece and quilt the mini quilt. I wanted to keep my piecing to a minimum to draw the attention to the thread painting. I decided to modify Tula’s Stacks quilt pattern by adding flying geese (my favorite paper piecing designs) and shrinking it down. Tula and I both thought rainbow order was the obvious choice for the borders.

So I began pulling all my Tula Pink stash out and making sure it was in rainbow order. (Wow I own a bunch of Tula fabric!) I used some of my mom’s stash too and combined we had nearly all of her previous lines represented (also some treasured fabrics like my Prince Charming Frogs).

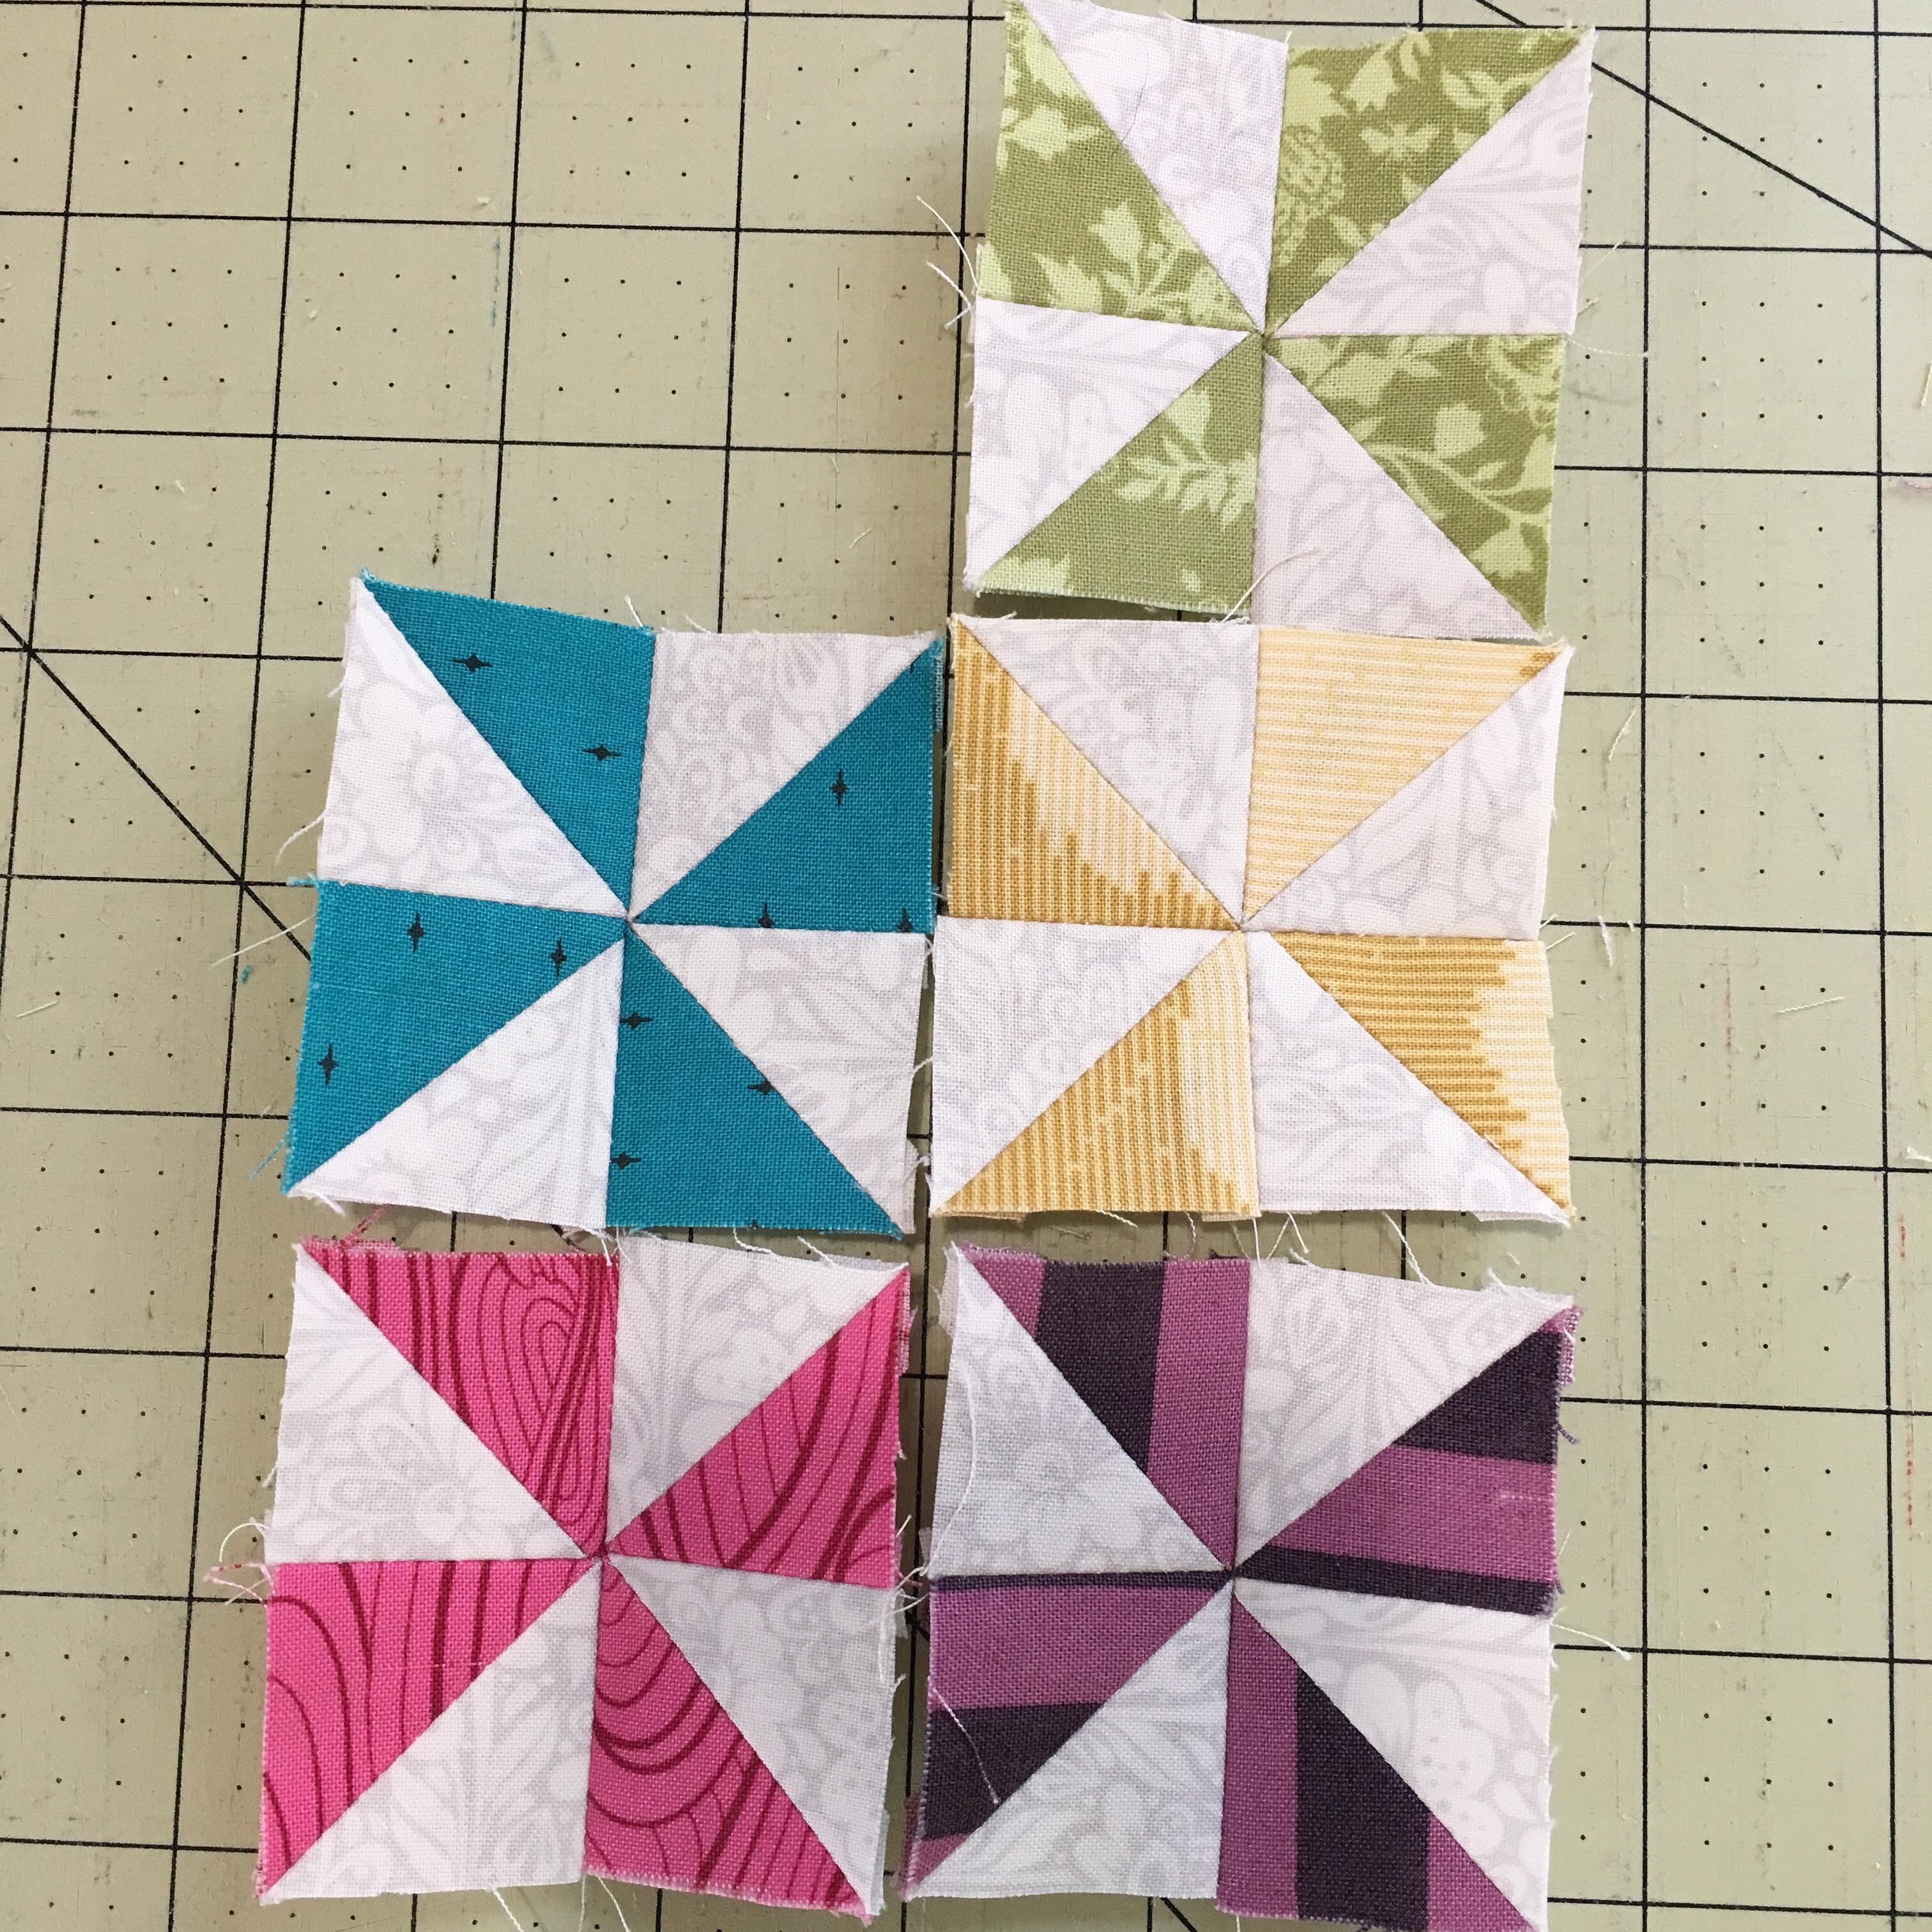
I made the cutest micro 2 inch pinwheels!
As I was laying out my strips, pinwheels, and flying geese, I was surprised at how many pieces I had to add to make my sides the correct length. (Thank you mom @kbcjohn for helping with the layout) I actually had to go buy fabric that would go in specific spots to add length and remain in color order. In the corners I chose major focal fabrics since these were larger squares. I wanted the stacks to look as if they were floating so I used the same tone on tone grey daisy fabric.

Time for quilting! I knew I wanted to attempt feathers that would wrap around the owl thread painting to create a cohesive finished design. But I had never done feathers other than on a few samples. I watched Angela Walters feather tutorials on Craftsy to get the motion down. I decided I didn’t want to free hand the feathers so I used a water/air soluble pen to draw the feathers on the quilt top. For the remainder of the grey background I quilted simple straight lines. In the stacks I sampled all different quilt designs, from pebbles to swirls. I left the pinwheels and flying geese unquilted to add dimension to the quilt. I hand bound the quilt in the same grey fabric so it wouldn’t distract from the thread painting/borders. The quilt finished 28 inches by 30 inches.
I absolutely love the way it came out. This is the largest and best piece I have ever created!


I’m so honored that Tula asked me to make this piece to represent her Ultimate Thread Collection. (This photo is the thread debut at Schoolhouse)

I can’t believe that my quilt will be hanging in the Aurifil booth at Quilt Market and then go on to tour with Aurifil at quilt shows. (This all still feels like a dream!) I can’t wait to see it hanging in the booth!
See you at Market!
Happy Quilting!
Xx Casey

I love the blog! The step by step pictures are great! I’m very proud of you! Love you, Mom.
LikeLike
Great post Casey! Loved seeing the close up pictures of the owl. So much detail. I’m really proud of you Casey! I hope you have many many more future projects like this in your future! Hope your having fun in SLC.
LikeLike
Wow! I cam across this today when searching for something Tula Pink-related and all I can say is WOW! This is gorgeous, you are so talented. Thank you for sharing so many photos and your process. I am glad you had such a dream come true, how awesome! Congratulations
LikeLiked by 1 person
You are so talented. Are you self taught? Your work is wonderful.
LikeLiked by 1 person
Thank you! Yes I am.
LikeLiked by 1 person
Amazing. I love it.
LikeLike